Configure Snowflake as your data pipeline destination
Set up Snowflake as a destination for your data pipeline. This connection enables Workato to replicate data from source applications into Snowflake using the source schema.
Features supported
The following features are supported when using Snowflake as a pipeline destination:
- Automatic creation of destination tables based on source schema
- Support for full and incremental data loads
- Field-level data replication without explicit field mapping
- Schema drift handling and update operations
- Use of staging and temporary tables for data integrity
Prerequisites
You must have the following configuration and access:
- A Snowflake account with access to a database, warehouse, and schema
- A user role with privileges to create tables and load data
- A supported authentication method: OAuth 2.0, key-pair authentication, or username/password
Connect to Snowflake
Complete the following steps to connect to Snowflake as a data pipeline destination. This connection allows the pipeline to replicate and load data into Snowflake.
Select Create > Connection.
Search for and select Snowflake on the New connection page.
Provide a name for your connection in the Connection name field.
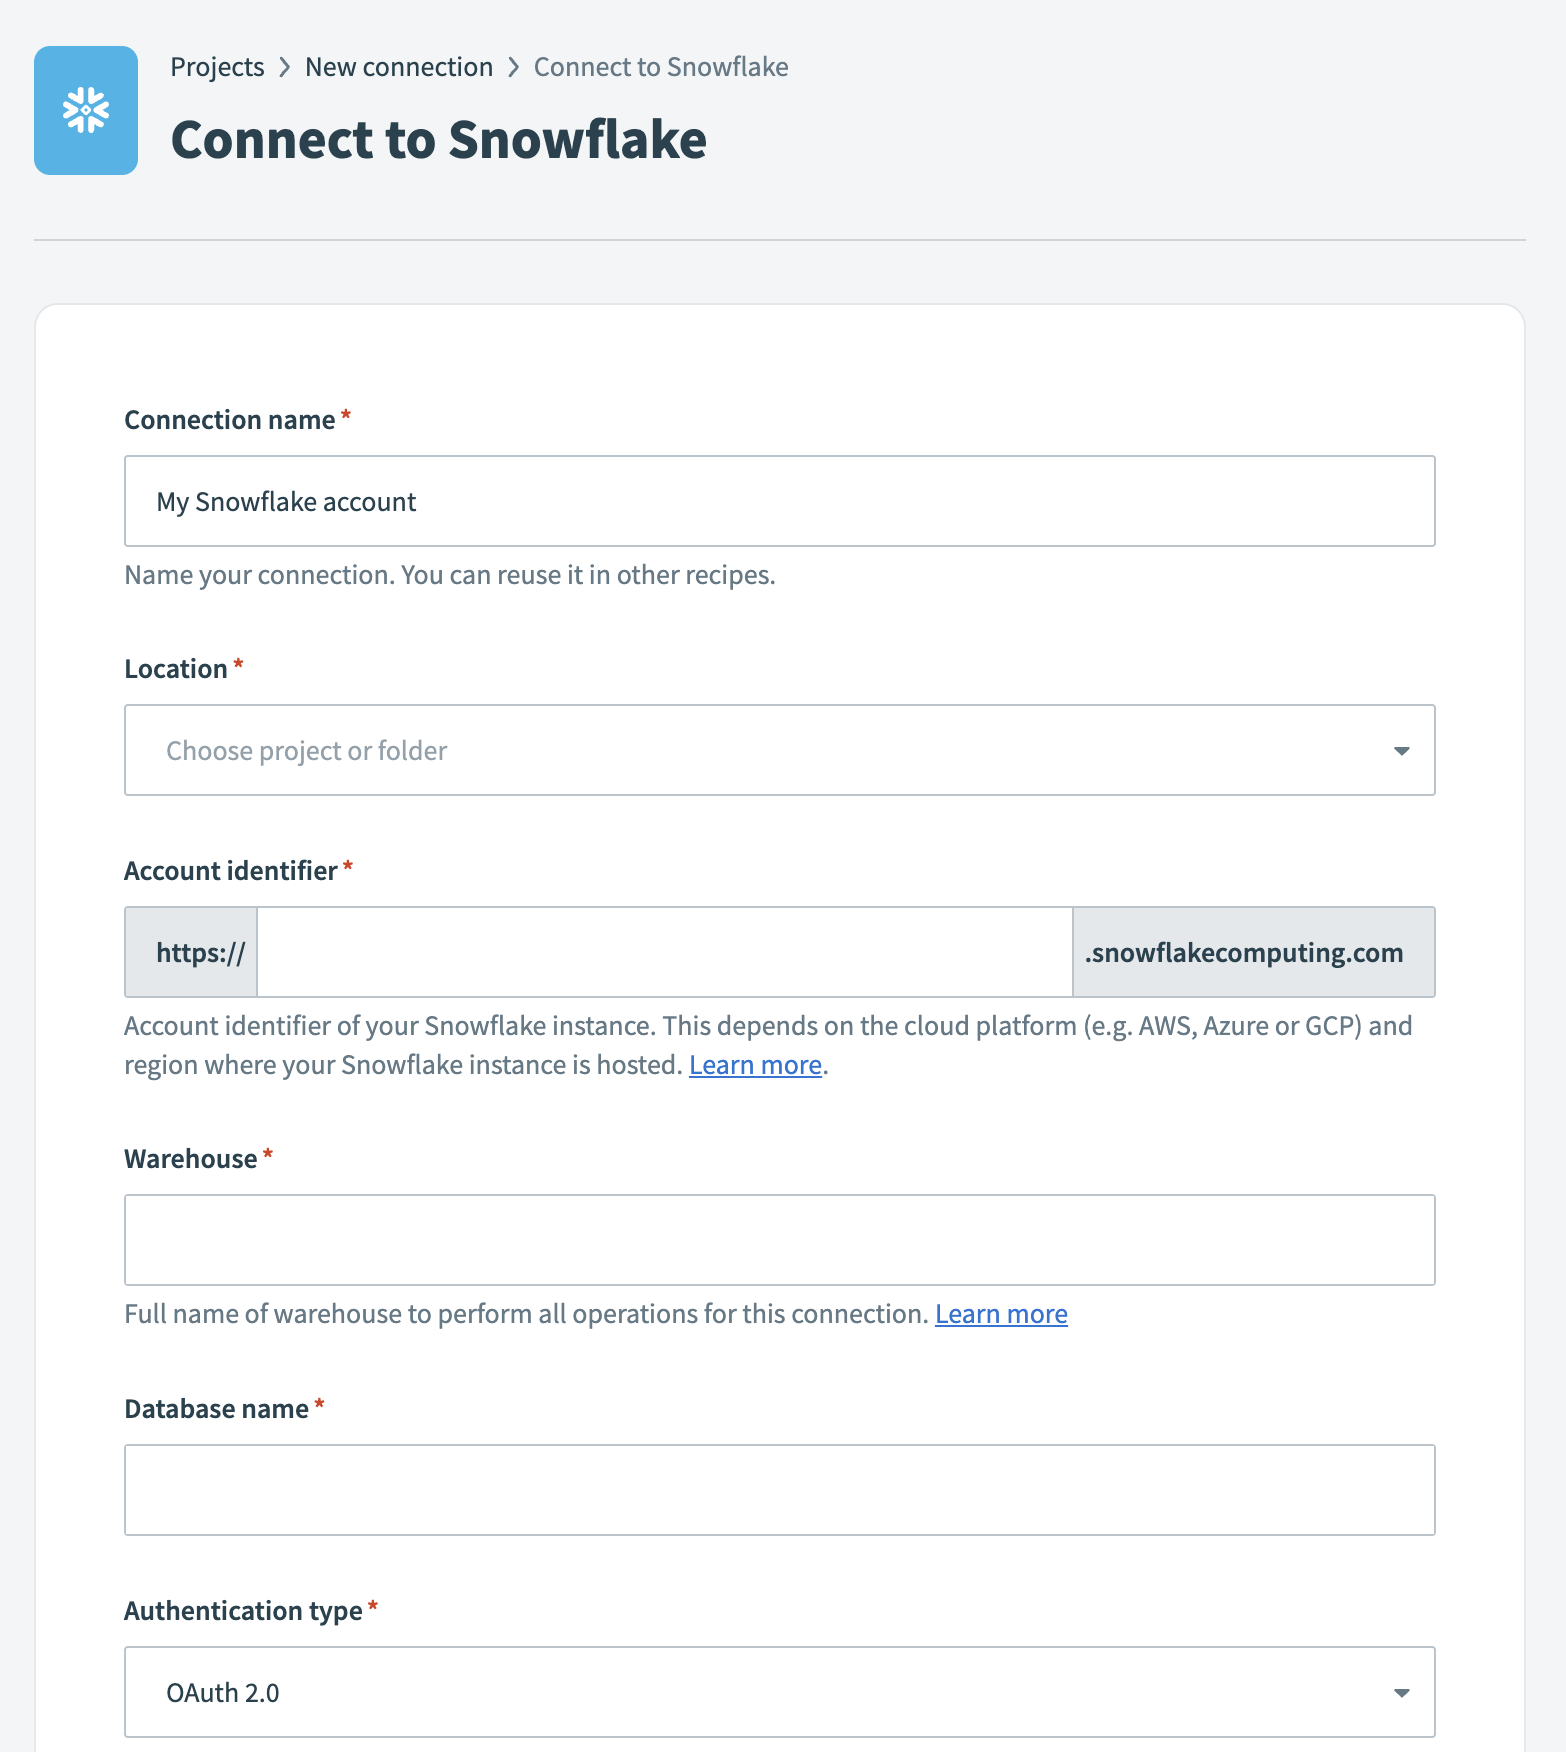 Snowflake connection setup
Use the Location drop-down menu to select the project where you plan to store the connection.
Enter the Account identifier of your Snowflake instance in one of the supported formats:
- Account name:
https://{orgname}-{account_name} - Connection name:
https://{orgname}-{connectionname} - Account locator:
https://{accountlocator}.{region}.{cloud}
Refer to the Snowflake Connecting to your accounts guide for more details.
ACCOUNT LOCATOR FORMAT
Certain locations require you to include the {region} and {cloud} in your account locator URL. For example:
- AWS US West (Oregon):
your-account-locator - AWS US East (Ohio):
your-account-locator.us-east-2 - Azure West Europe:
your-account-locator.west-europe.azure
Refer to the Using an account locator as an identifier guide for more information.
Enter the Warehouse name to define the compute resources for this connection. Refer to the Warehouse considerations section for more information.
Enter the Database name for the target Snowflake database.
Select an Authentication type:
- OAuth 2.0: Requires a Client ID and Client secret.
- Key-pair authentication: Requires a Snowflake User name, a Private key in PKCS#8 format, and a Private key passphrase if the key is encrypted.
- Username/Password: Requires a User name and Password.
SNOWFLAKE USERNAME/PASSWORD DEPRECATION
Snowflake plans to deprecate single-factor password authentication for users by November 2025.
We strongly encourage you to migrate all existing Username/Password connections to OAuth 2.0 or Key-pair authentication before this date. Existing Username/Password connections will remain operational until the deprecation date.
Refer to the Snowflake connector authentication options section for configuration steps.
Optional. Specify a Role for authentication. This role must be an existing role assigned to the user. If left blank, Snowflake uses the default role assigned to the user.
Optional. Enter the Schema. If left blank, the default schema is public.
Optional. Set the Use improved datetime handling (Recommended) to Yes to ensure correct timezone handling for timestamps.
Optional. Define the Database timezone to apply to timestamps without an assigned timezone.
Click Connect to verify and establish the connection.
Configure the destination action
Before you start the pipeline, ensure the schema in Snowflake is newly created and empty. This prevents errors during the initial sync and ensures the pipeline can create destination tables without conflicts.
Click the Load data to target table in destination app action. This action defines how the pipeline replicates data in the destination.
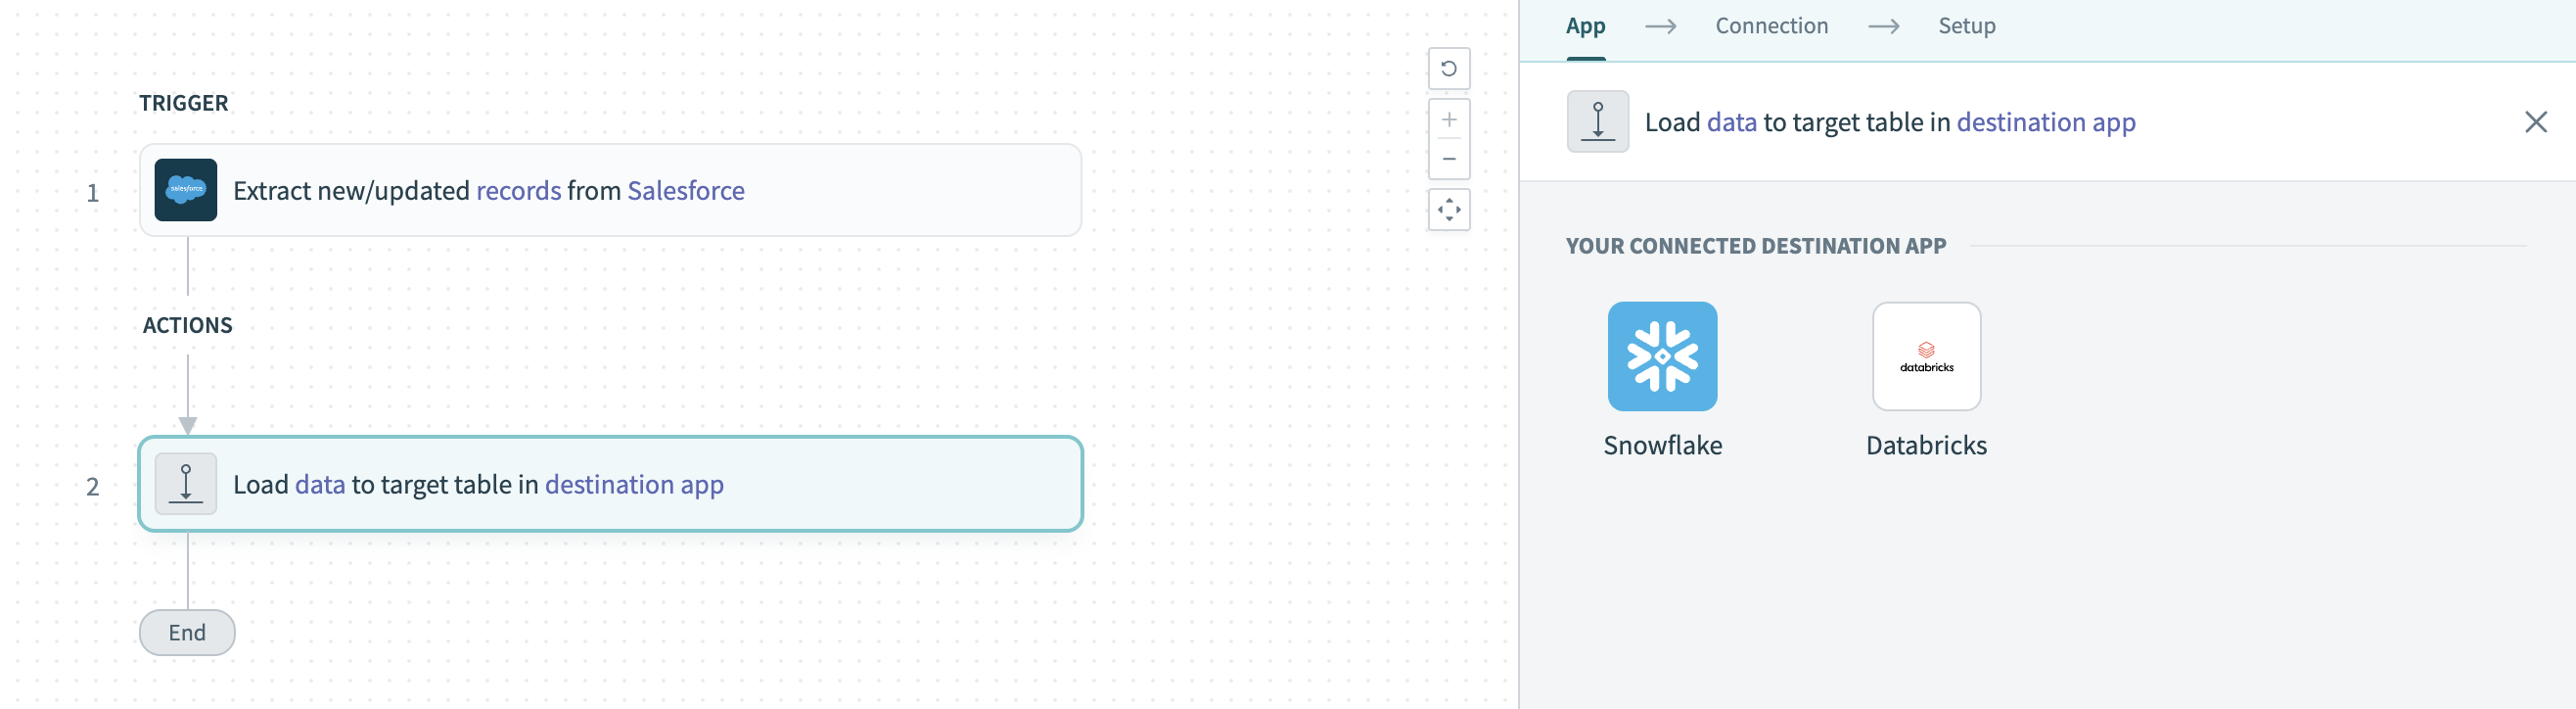 Configure the Load data to target table in destination app action
Select Snowflake in the Your Connected Destination App field.
Choose the Snowflake connection you plan to use for this pipeline. Alternatively, click + New connection to create a new connection.
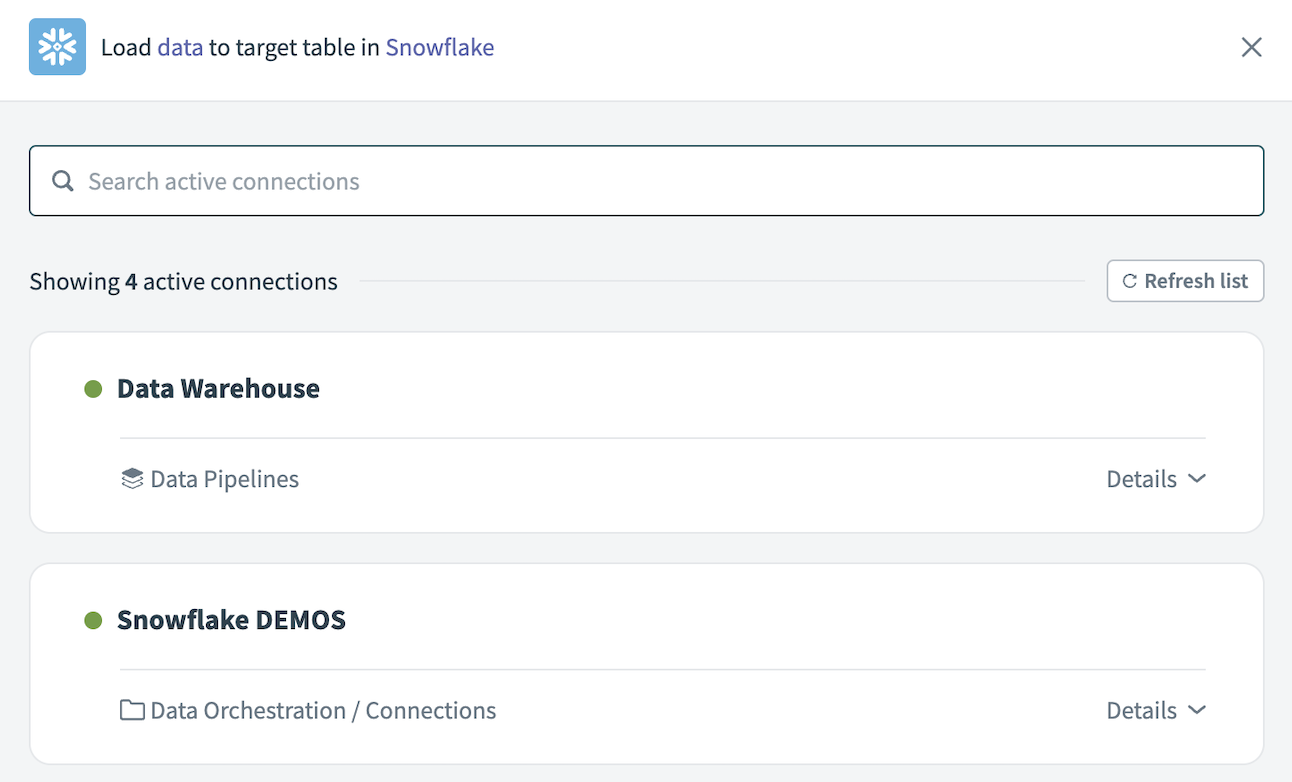 Choose a Snowflake connection
The Load data to target table in destination app action automatically replicates the object schema from the source to Snowflake. Explicit field mapping isn't required.
Workato pipelines automatically create destination tables based on the source schema. The pipeline also creates a stage and temporary tables to support data replication and update operations.
Select Save to save the pipeline.
Identifier handling
Workato applies the following transformations to object and field names when replicating data into Snowflake:
- Column names are uppercased
- Special characters such as
$, spaces, or dashes are replaced with underscores (_) - Identifiers are wrapped in double quotes to support special characters and reserved words
These transformations ensure compatibility with Snowflake's SQL syntax and reserved keywords.
Example
The following source table structure:
| Source object | Source field |
|---|---|
Account | $Name$, CreatedDate, Limit |
Results in the following table created in Snowflake:
CREATE TABLE "ACCOUNT" ("_NAME_", "CREATEDDATE", "LIMIT")Snowflake treats unquoted identifiers as case-insensitive, so you can run queries such as the following:
SELECT createddate FROM account;
SELECT "LIMIT" FROM ACCOUNT;
Quoted queries must match the exact case of the identifier.
Last updated: