# LLM, Snowflake, and Workato Developer API
This use case provides step-by-step instructions to create a custom MCP integration between an LLM and Snowflake using the Workato Developer API. This integration transforms how teams access and analyze data by enabling natural language queries that automatically retrieve structured insights from Snowflake.
# What does this MCP server integration do?
This MCP server integration enables you to:
- Query Snowflake sales data using natural language commands in an LLM
- Filter and aggregate data by city, state, region, and sales value
- Retrieve key metrics including total sales, order counts, and product performance
- Explore data iteratively without writing SQL or switching tools
- Get contextualized insights with business narratives, not just raw numbers
# Create Your MCP Integration
Complete the following steps to build an integration that enables teams to query Snowflake data from an LLM using natural language commands.
USE CASES ARE INTENDED AS EXAMPLES ONLY
This use case serves as an example. Modifications to SQL queries, request schemas, or conditional logic may be necessary to adapt this recipe to your specific Snowflake schema and business requirements.
Sign in to Workato.
Select the project where you plan to create the API request recipe for your MCP server.
Create a Snowflake connection.
# Snowflake connection setup
This step connects your Snowflake account to your Workato account. Refer to Snowflake authentication methods for more information.
Snowflake plans to deprecate single-factor password authentication for users by November 2025. Refer to Snowflake's official deprecation announcement (opens new window) for more information.
We strongly encourage you to migrate all existing Username/Password connections to OAuth 2.0 or Key-pair authentication before this date. Existing Username/Password connections will remain operational until the deprecation date.
The Snowflake connector supports OAuth 2.0, private key, and username/password authentication. You must add Workato IP addresses to the allowlist if your Snowflake instance has network policies that restrict access based on IP address.
Complete the following steps to connect to Snowflake:
Select Create > Connection.
Search for and select Snowflake on the New connection page.
Provide a name for your connection in the Connection name field.
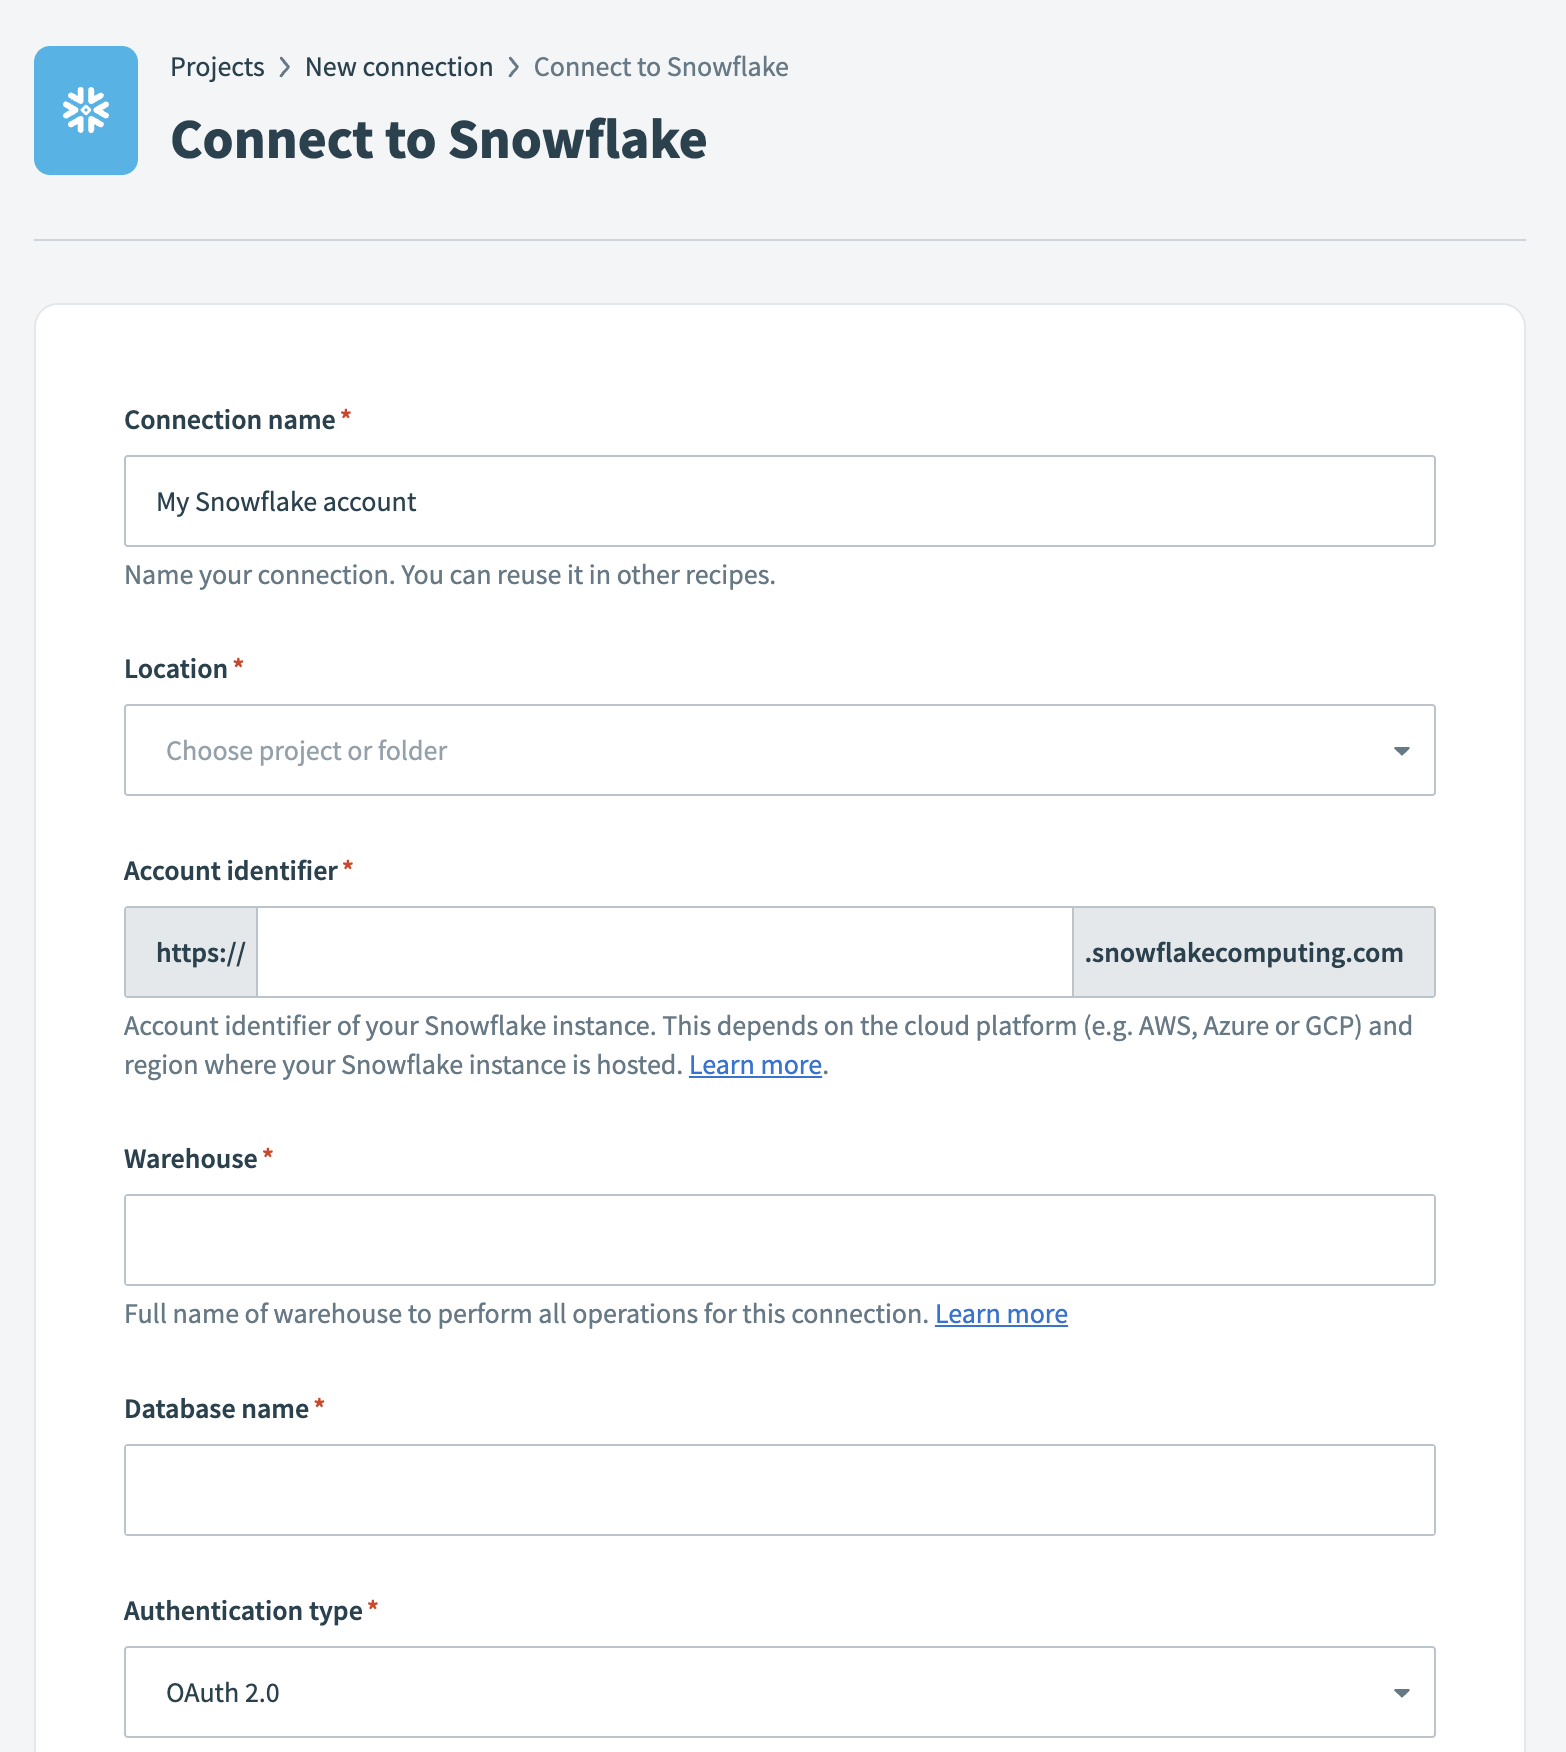 Snowflake connection
Use the Location drop-down menu to select the project where you plan to store the connection.
Enter the Account identifier (opens new window) of your Snowflake instance in one of the supported formats:
- Account name:
https://{orgname}-{account_name} - Connection name:
https://{orgname}-{connectionname} - Account locator:
https://{accountlocator}.{region}.{cloud}
Refer to the Snowflake Connecting to your accounts guide (opens new window) for more information.
ACCOUNT LOCATOR FORMAT
Certain locations require you to include the {region} and {cloud} in your account locator URL. For example:
- AWS US West (Oregon):
your-account-locator - AWS US East (Ohio):
your-account-locator.us-east-2 - Azure West Europe:
your-account-locator.west-europe.azure
Refer to the Using an account locator as an identifier (opens new window) guide for more information.
Enter the Warehouse name to define the compute resources for this connection. Refer to the Warehouse considerations section for more information.
Enter the Database name for the target Snowflake database.
Select an Authentication type for your Snowflake connection. Refer to the Snowflake connector authentication options section for configuration steps.
Optional. Specify a Role for authentication. This role must be an existing role assigned to the user. If left blank, Snowflake uses the default role assigned to the user.
Optional. Enter the Schema. If left blank, the default schema is public.
Optional. Set the Use improved datetime handling (Recommended) to Yes to ensure correct timezone handling for timestamps.
Optional. Define the Database timezone to apply to timestamps without an assigned timezone.
Click Connect to verify the connection.
Set up your New API request trigger.
# New API request trigger setup
This trigger defines how the MCP server calls your recipe and what parameters it expects.
Search for API platform by Workato and select it as your app.
Select the New API request trigger.
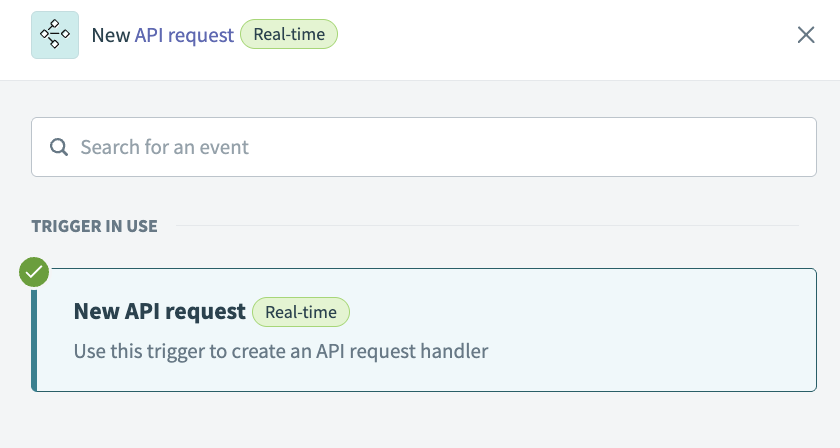 New API request trigger
Complete the following steps to configure your request schema:
Go to the Request schema section and click + Add Field.
Enter region in the Name and Label fields.
Use the Data type drop-down menu to select String.
Use the Optional drop-down menu to select Yes.
Click Save.
Return to the Request schema section and click + Add Field.
Enter city in the Name and Label fields.
Use the Data type drop-down menu to select String.
Use the Optional drop-down menu to select Yes.
Click Save.
Return to the Request schema section and click + Add Field.
Enter state in the Name and Label fields.
Use the Data type drop-down menu to select String.
Use the Optional drop-down menu to select Yes.
Click Save.
Return to the Request schema section and click + Add Field.
Enter sales_value in the Name and Label fields.
Use the Data type drop-down menu to select Number.
Use the Optional drop-down menu to select Yes.
Click Save.
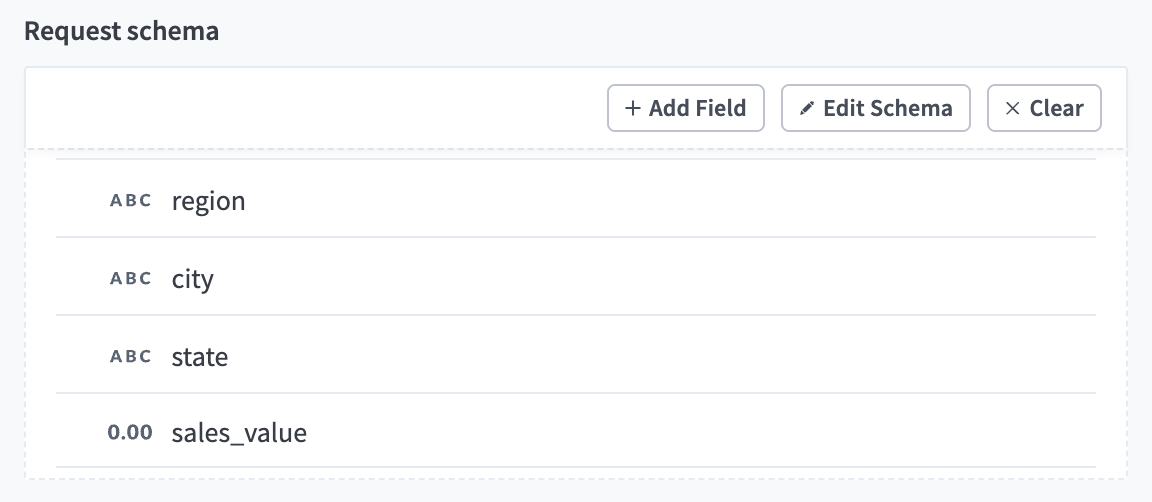 Request schema
Complete the following steps to configure your success request response:
Go to the Responses section and click Add response.
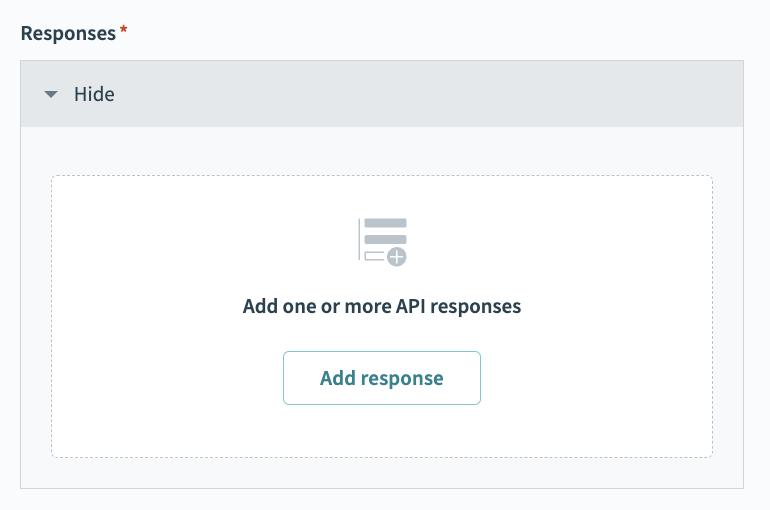 Click Add response
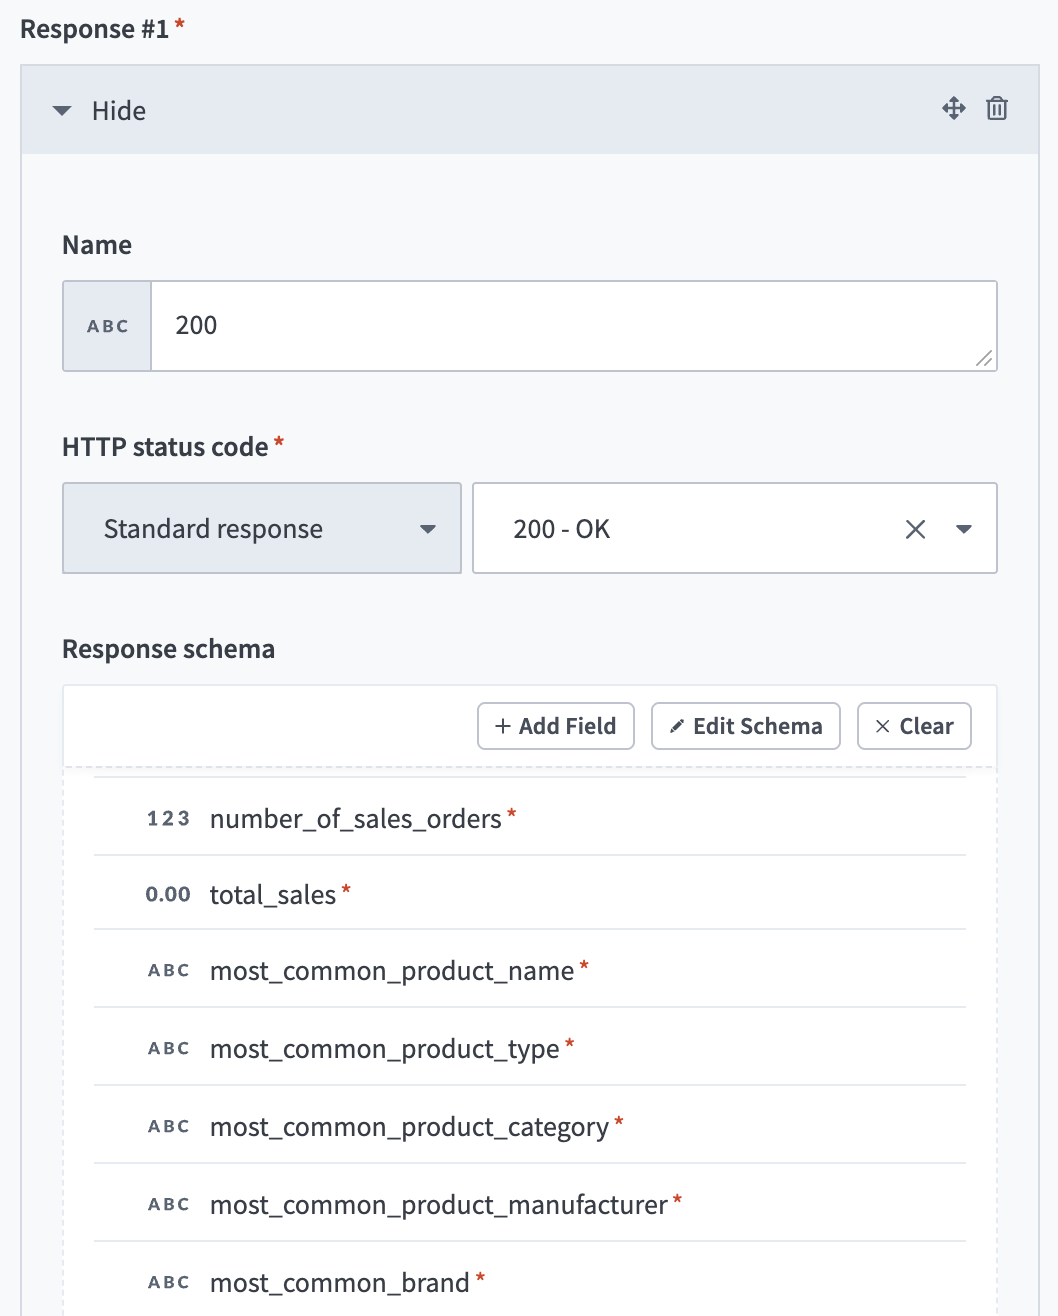
Enter 200 in the Name field.
Use the HTTPS status code standard response drop-down menu to select 200 - OK.
Go to the Response schema section and click add fields manually.
Enter number_of_sales_orders in the Name and Label fields.
Use the Data type drop-down menu to select Integer.
Use the Optional drop-down menu to select No.
Click Save.
Return to the Response schema section and click + Add Field.
Enter total_sales in the Name and Label fields.
Use the Data type drop-down menu to select Number.
Use the Optional drop-down menu to select No.
Click Save.
Return to the Response schema section and click + Add Field.
Enter most_common_product_name in the Name and Label fields.
Use the Data type drop-down menu to select String.
Use the Optional drop-down menu to select No.
Click Save.
Return to the Response schema section and click + Add Field.
Enter most_common_product_type in the Name and Label fields.
Use the Data type drop-down menu to select String.
Use the Optional drop-down menu to select No.
Click Save.
Return to the Response schema section and click + Add Field.
Enter most_common_product_category in the Name and Label fields.
Use the Data type drop-down menu to select String.
Use the Optional drop-down menu to select No.
Click Save.
Return to the Response schema section and click + Add Field.
Enter most_common_product_manufacturer in the Name and Label fields.
Use the Data type drop-down menu to select String.
Use the Optional drop-down menu to select No.
Click Save.
Return to the Response schema section and click + Add Field.
Enter most_common_brand in the Name and Label fields.
Use the Data type drop-down menu to select String.
Use the Optional drop-down menu to select No.
Click Save.
 Success request response
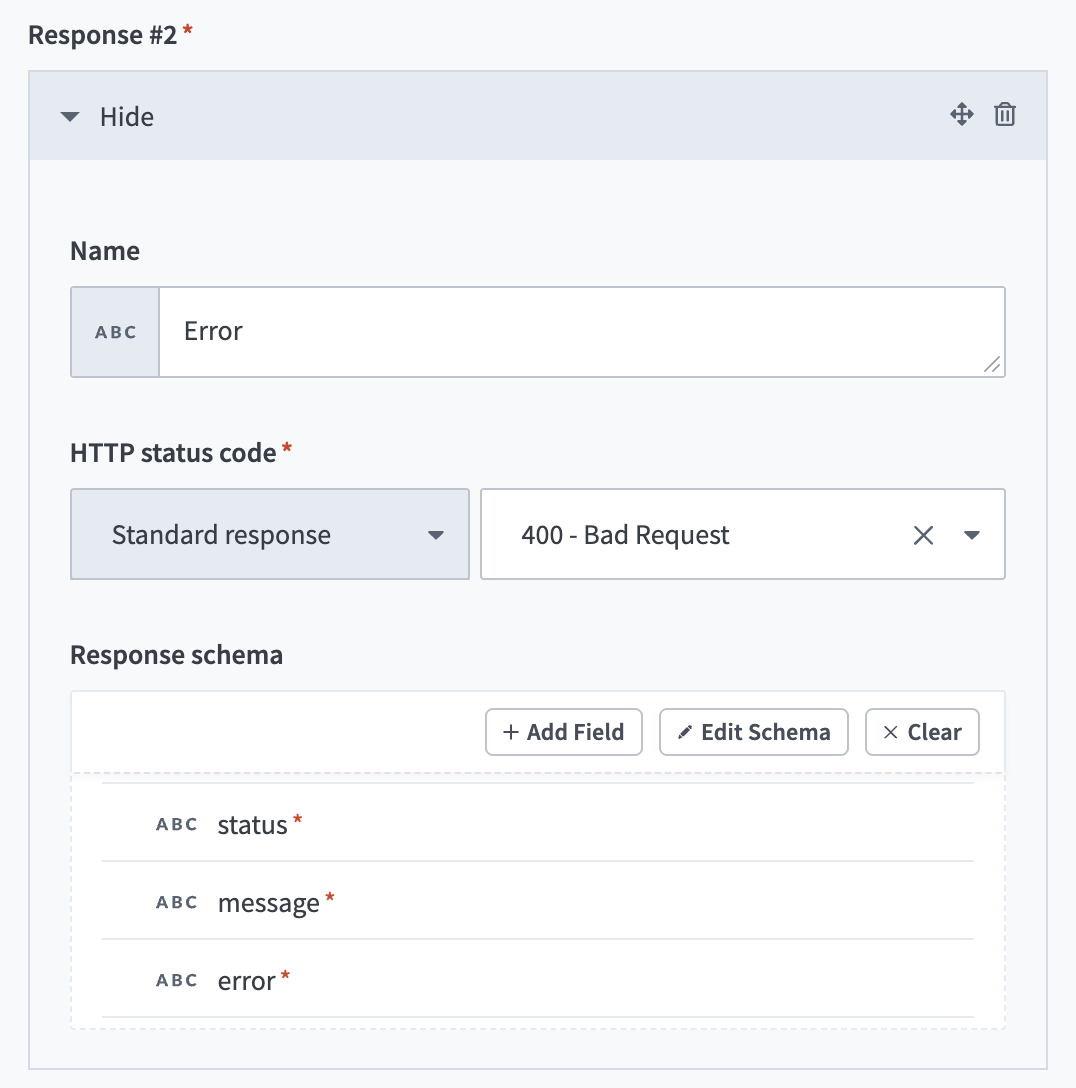
Complete the following steps to configure your error request response:
Return to the Responses section and click Add response.
Enter Error in the Name field.
Use the HTTPS status code standard response drop-down menu to select 400 - Bad request.
Go to the Response schema section and click add fields manually.
Enter status in the Name and Label fields.
Use the Data type drop-down menu to select String.
Use the Optional drop-down menu to select No.
Click Save.
Click +Add Field.
Enter message in the Name and Label fields.
Use the Data type drop-down menu to select String.
Use the Optional drop-down menu to select No.
Click Save.
Click +Add Field.
Enter error in the Name and Label fields.
Use the Data type drop-down menu to select String.
Use the Optional drop-down menu to select No.
Click Save.
 Error request response
Click + Add step and select Action in app.
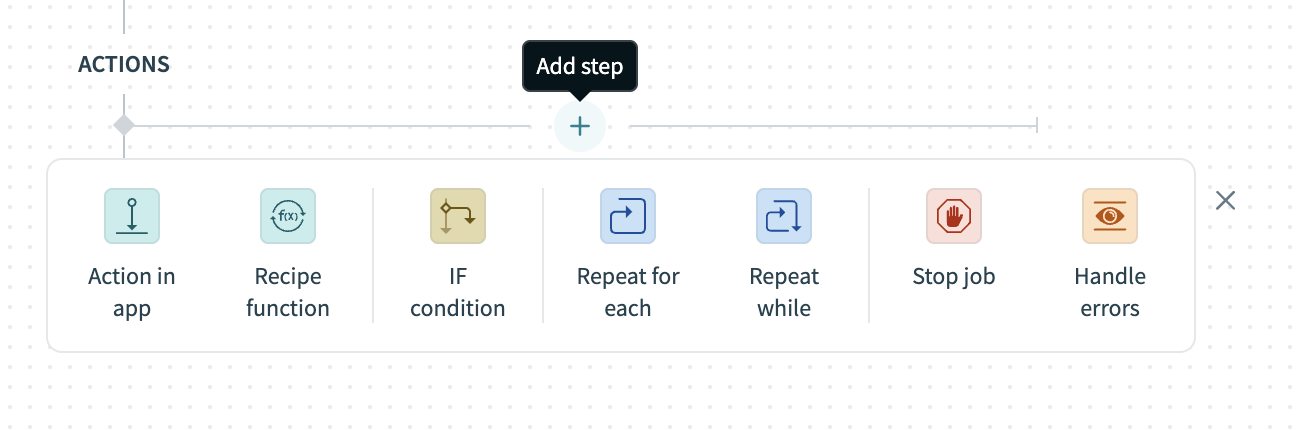 Click Add step > Action in app
Set up your Snowflake Run custom SQL action.
# Run custom SQL in Snowflake action setup
This step queries Snowflake for the information you configured in the preceding steps.
Complete the following steps to configure your Run custom SQL action:
Search for and select Snowflake as your app.
Select the Run custom SQL action.
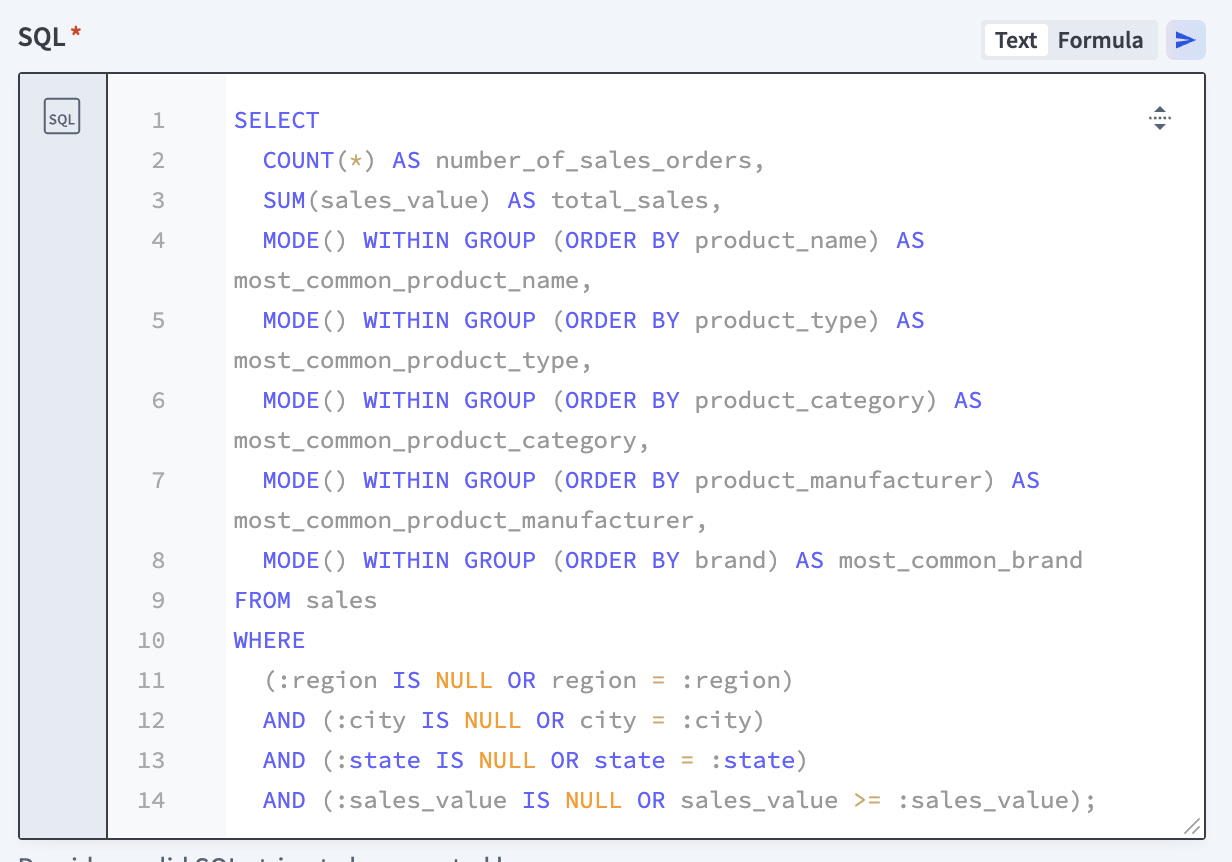
Go to the SQL field and paste the following query:
SELECT
  COUNT(*) AS number_of_sales_orders,
  SUM(sales_value) AS total_sales,
  MODE() WITHIN GROUP (ORDER BY product_name) AS most_common_product_name,
  MODE() WITHIN GROUP (ORDER BY product_type) AS most_common_product_type,
  MODE() WITHIN GROUP (ORDER BY product_category) AS most_common_product_category,
  MODE() WITHIN GROUP (ORDER BY product_manufacturer) AS most_common_product_manufacturer,
  MODE() WITHIN GROUP (ORDER BY brand) AS most_common_brand
FROM sales
WHERE
  (:region IS NULL OR region = :region)
  AND (:city IS NULL OR city = :city)
  AND (:state IS NULL OR state = :state)
  AND (:sales_value IS NULL OR sales_value >= :sales_value);
 Provide an SQL string
Complete the following steps to configure your output fields:
Go to the Output fields section and click + Add Field.
Enter number_of_sales_orders in the Name and Label fields.
Use the Data type drop-down menu to select Integer.
Use the Optional drop-down menu to select No.
Click Save.
Click +Add Field.
Enter total_sales in the Name and Label fields.
Use the Data type drop-down menu to select Number.
Use the Optional drop-down menu to select No.
Click Save.
Click +Add Field.
Enter most_common_product_name in the Name and Label fields.
Use the Data type drop-down menu to select String.
Use the Optional drop-down menu to select No.
Click Save.
Click +Add Field.
Enter most_common_product_type in the Name and Label fields.
Use the Data type drop-down menu to select String.
Use the Optional drop-down menu to select No.
Click Save.
Click +Add Field.
Enter most_common_product_category in the Name and Label fields.
Use the Data type drop-down menu to select String.
Use the Optional drop-down menu to select No.
Click Save.
Click +Add Field.
Enter most_common_product_manufacturer in the Name and Label fields.
Use the Data type drop-down menu to select String.
Use the Optional drop-down menu to select No.
Click Save.
Click +Add Field.
Enter most_common_brand in the Name and Label fields.
Use the Data type drop-down menu to select String.
Use the Optional drop-down menu to select No.
Click Save.
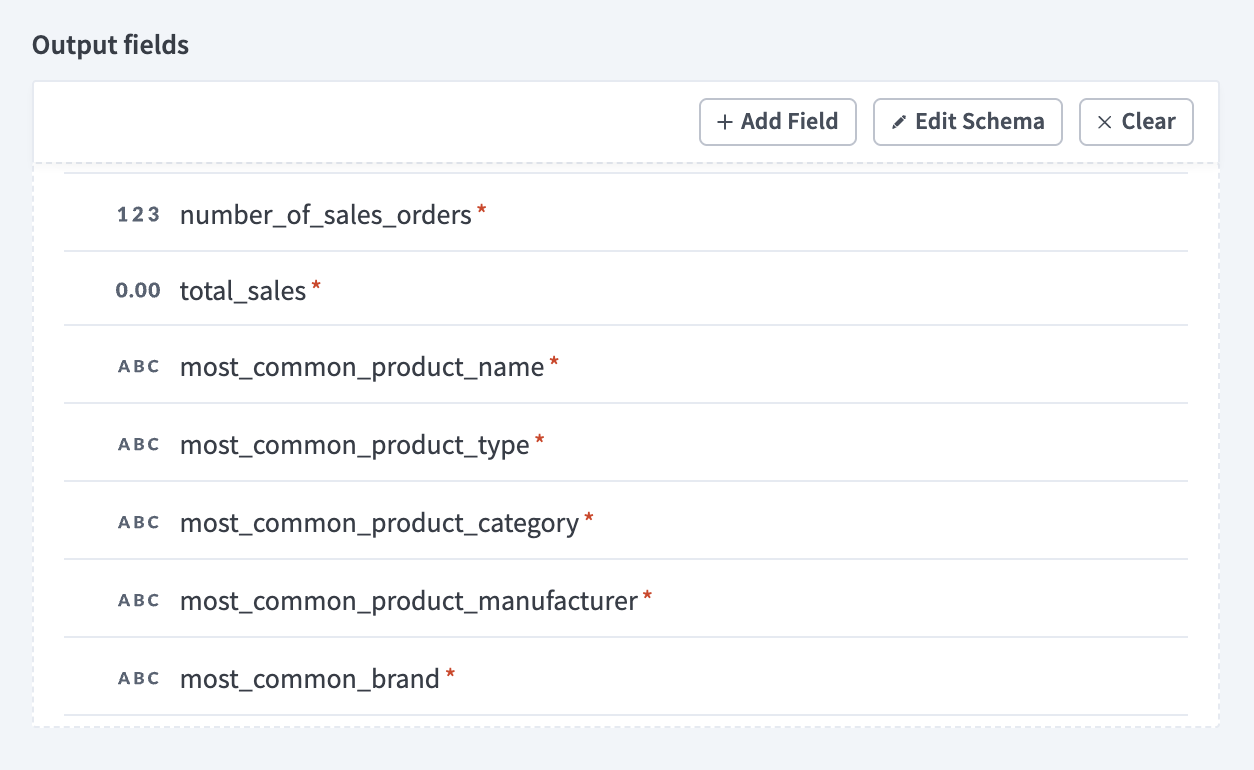 Snowflake Output fields
Click + Add step and select Handle errors.
Click Add step > Handle errors
Configure your ERROR FOUND? block.
# Configure an ERROR FOUND? block
This step tells your recipe monitor the Run custom SQL action for errors. It instructs your LLM agent to respond with the 200 response or the Error response you configured in the New API request trigger response schema.
Complete the following steps to configure your ERROR FOUND? block:
Go to the Yes branch and ensure that Retry actions in Monitor block? is set to DO NOT RETRY.
Click + Add step under DO NOT RETRY.
Click Select an app and action. Search for and select API platform by Workato as your app.
Select Respond to API request as your action.
Use the Response drop-down menu to select Error.
Expand the Response body section.
Map the Errored action Step 5 datapill to the Status field.
Map the Error message Step 5 datapill to the Message field.
Map the Error type ID Step 5 datapill to the Error field.
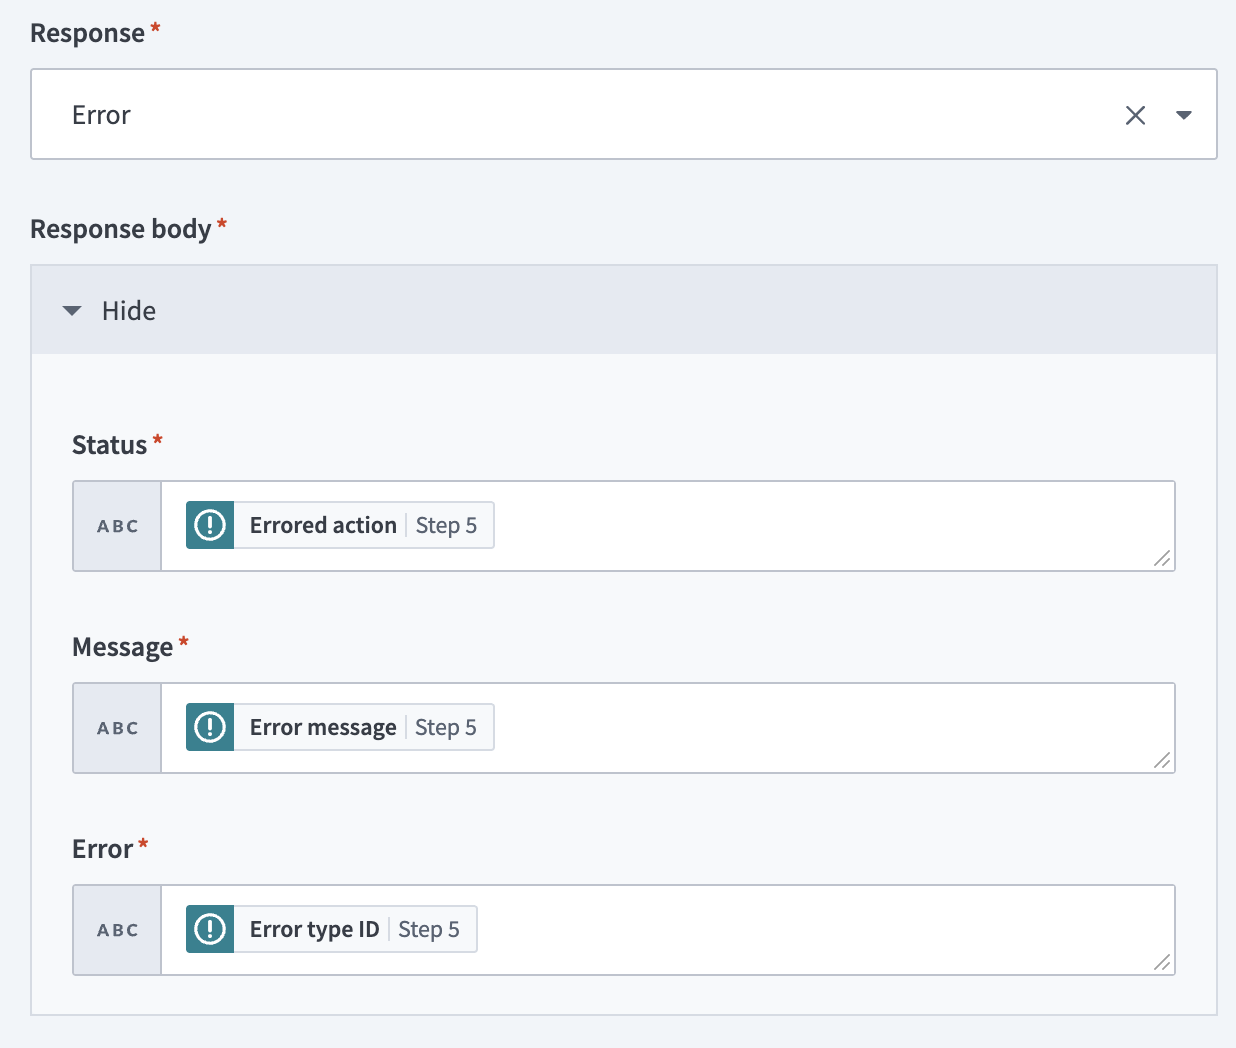 Configure your ERROR FOUND? block
Click Save.
Go to the No branch and click Select an app and action.
Search for and select API platform by Workato as your app.
Select Respond to API request as your action.
Use the Response drop-down menu to select 200.
Expand the Response body section.
Map the Snowflake number_of_sales_orders Step 4 datapill to the number_of_sales_orders field.
Map the Snowflake total_sales Step 4 datapill to the total_sales field.
Map the Snowflake most_common_product_name Step 4 datapill to the most_common_product_name field.
Map the Snowflake most_common_product_type Step 4 datapill to the most_common_product_type field.
Map the Snowflake most_common_product_category Step 4 datapill to the most_common_product_category field.
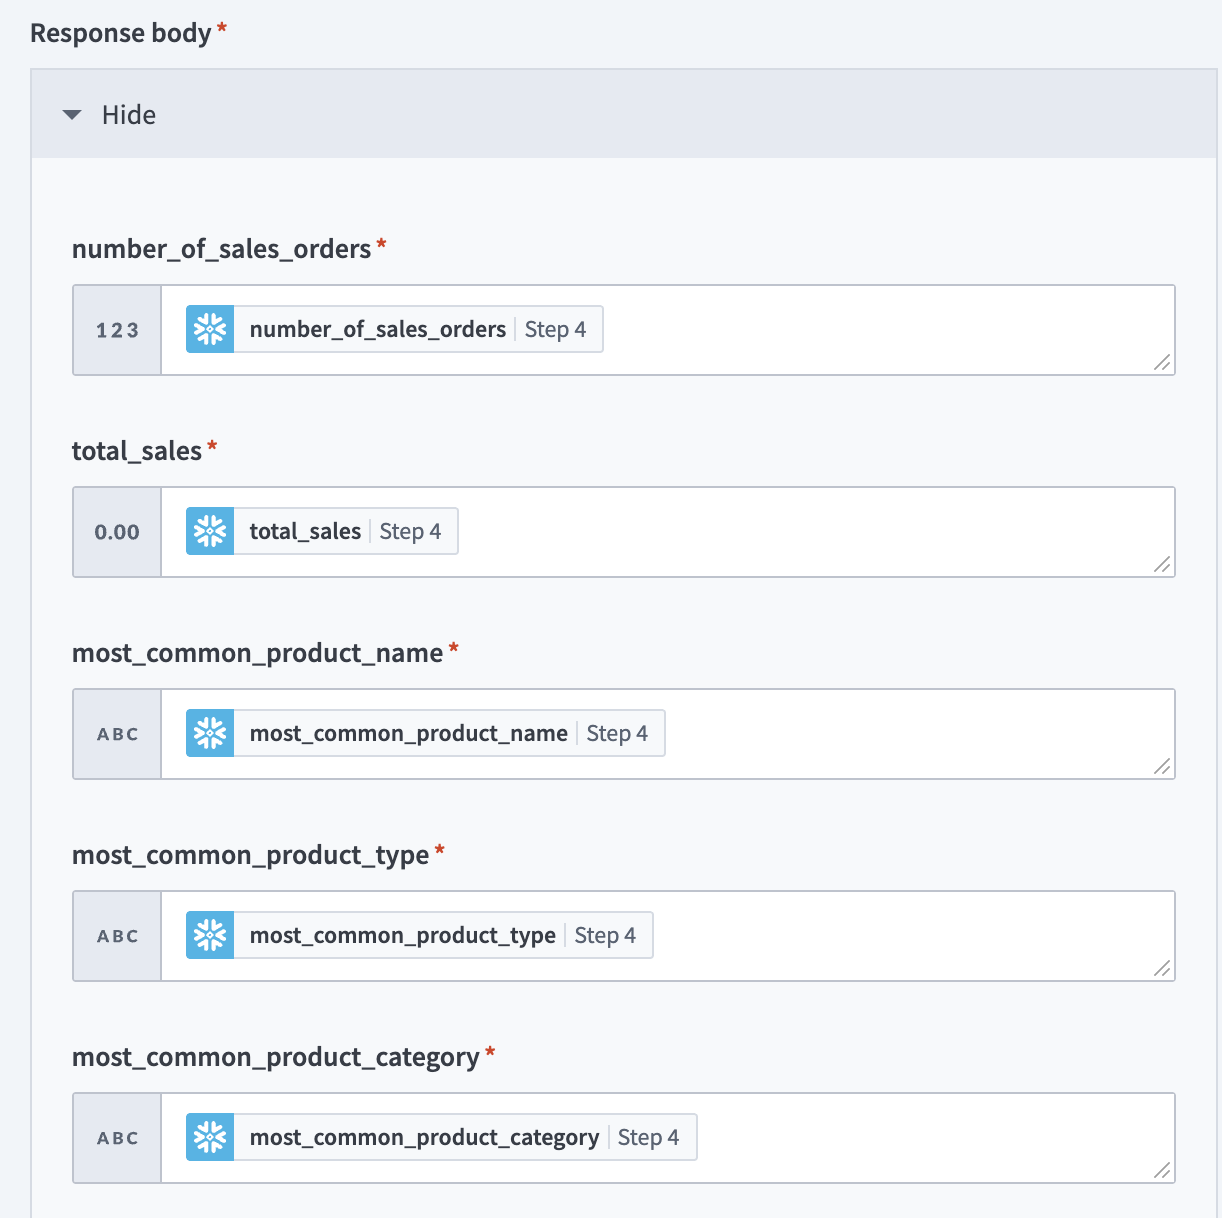
200 success response body
Map the Snowflake most_common_product_manufacturer Step 4 datapill to the most_common_product_manufacturer field.
Map the Snowflake most_common_brand Step 4 datapill to the most_common_brand field.
Click Save.
Create an MCP server.
# Create an MCP server
This step creates a new MCP server and adds your API request and Snowflake recipe. Recipes you add to the MCP server become tools you can use in your LLM.
Go to AI Hub and select the MCP servers tab.
Click + Create an MCP server.
Provide a name for your MCP server in the MCP server name field. For example: Snowflake analysis tool
Optional. Provide a description of your MCP server in the Description field. LLMs use this description to understand your server. The description isn't visible to end users.
Use the Location drop-down menu to select a location for your MCP server.
Go to the Tool source section and select Project assets.
Select the checkbox for the API and Snowflake recipe you created in the preceding steps.
Click Create MCP server. Your MCP automatically displays the Overview tab.
Click Settings > End user access.
Go to the Developer MCP Token section and click Copy to copy your MCP server URL and token for use in later steps.
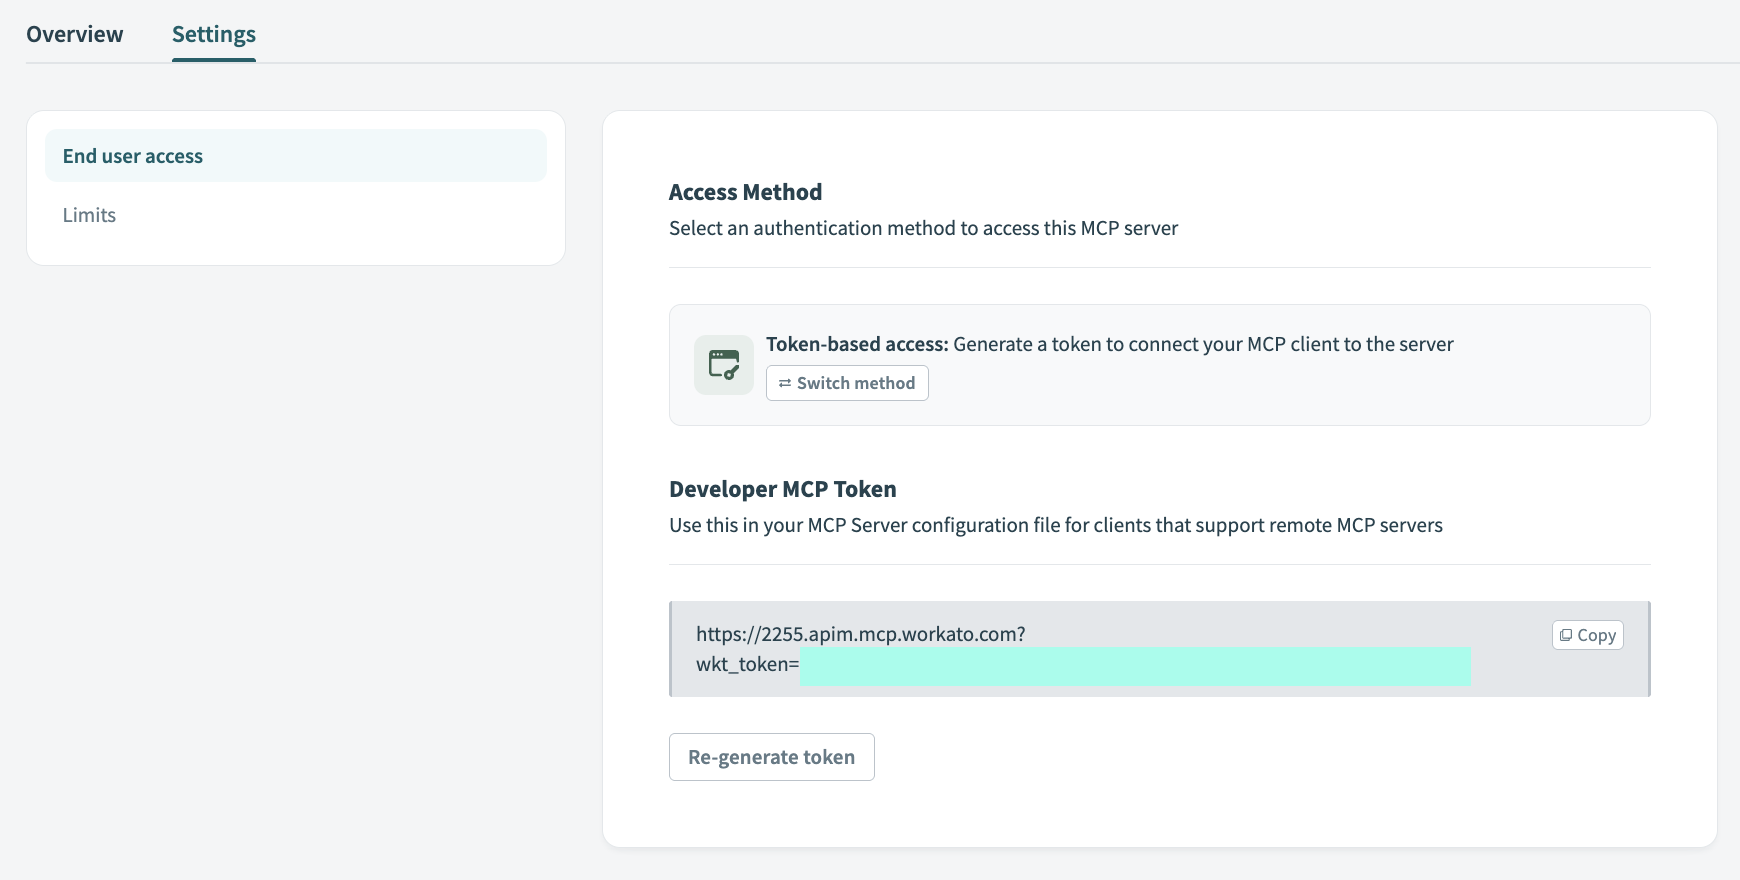 Copy the MCP URL
Go to the LLM where you plan to create an MCP integration and complete the following configuration steps:
TESTED LLMS
This use case has been tested with ChatGPT, Claude, and Cursor. Configuration and usage may vary with other LLMs.
Configure your MCP integration in ChatGPT.
# ChatGPT MCP configuration
This step configures a new MCP server connector in your OpenAI account that enables you to use natural language commands in ChatGPT to extract insights from your Snowflake data.
Go to your ChatGPT account.
Go to Settings > Apps & Connectors > Advanced settings and enable the Developer mode toggle.
Go to Settings > Apps & Connectors.
Click Create. This button is only visible when the Developer mode toggle is enabled.
Enter a name for your MCP connector in the Name field.
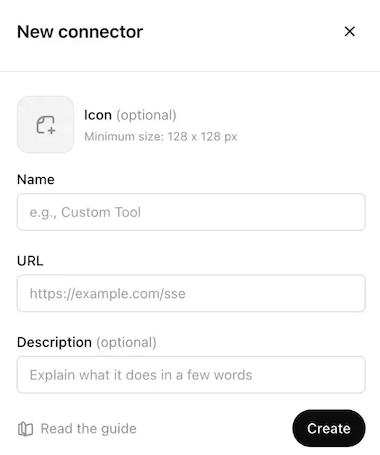 Configure your ChatGPT MCP connector
Paste your MCP URL and token in the URL field.
Optional. Enter a description in the Description field.
Use the Authentication drop-down menu to select No Auth.
Select the checkbox to accept the risk of adding a custom MCP server.
Click Create.
Create a new chat in ChatGPT to use your MCP tools.
Configure your MCP integration for Claude.
# Claude MCP configuration
This step configures a new MCP server connector in your Anthropic account that enables you to use natural language commands in Claude to extract insights from your Snowflake data.
Go to Settings > Connectors.
Click + Add new connector.
Enter a name for your MCP connector in the Name field.
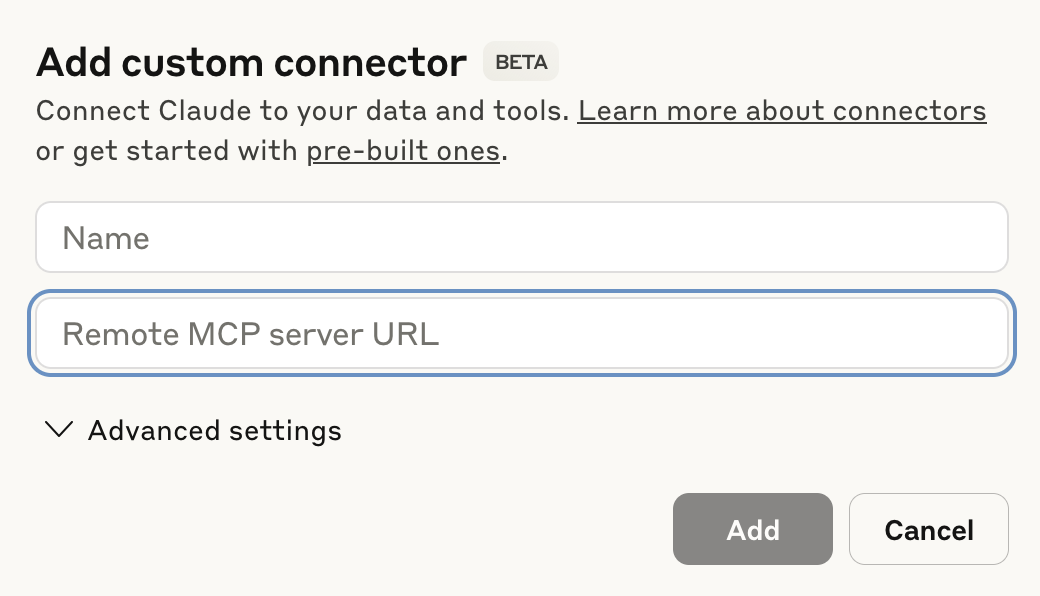 Configure your Claude MCP connector
Paste your MCP URL and token into the Remote MCP server URL field.
Click Add. The newly created MCP connector appears in the list of connectors.
Click Configure.
Use the permissions drop-down menu to select Always ask permission or Allow unsupervised. Always ask permission is selected by default.
Create a new chat in Claude to use your MCP tools.
Configure your MCP integration for Cursor.
# Cursor MCP configuration
This step configures a new MCP server connector in your Cursor account that enables you to use natural language commands to extract insights from your Snowflake data. This process authenticates with an MCP URL and authentication token. Refer to Cursor MCP remote server configuration with Workato Identity authentication if you plan to authenticate with Workato Identity.
Go to Settings > Cursor settings.
Click MCP & Integrations in the sidebar.
Click + New MCP Server to open the mcp.json file.
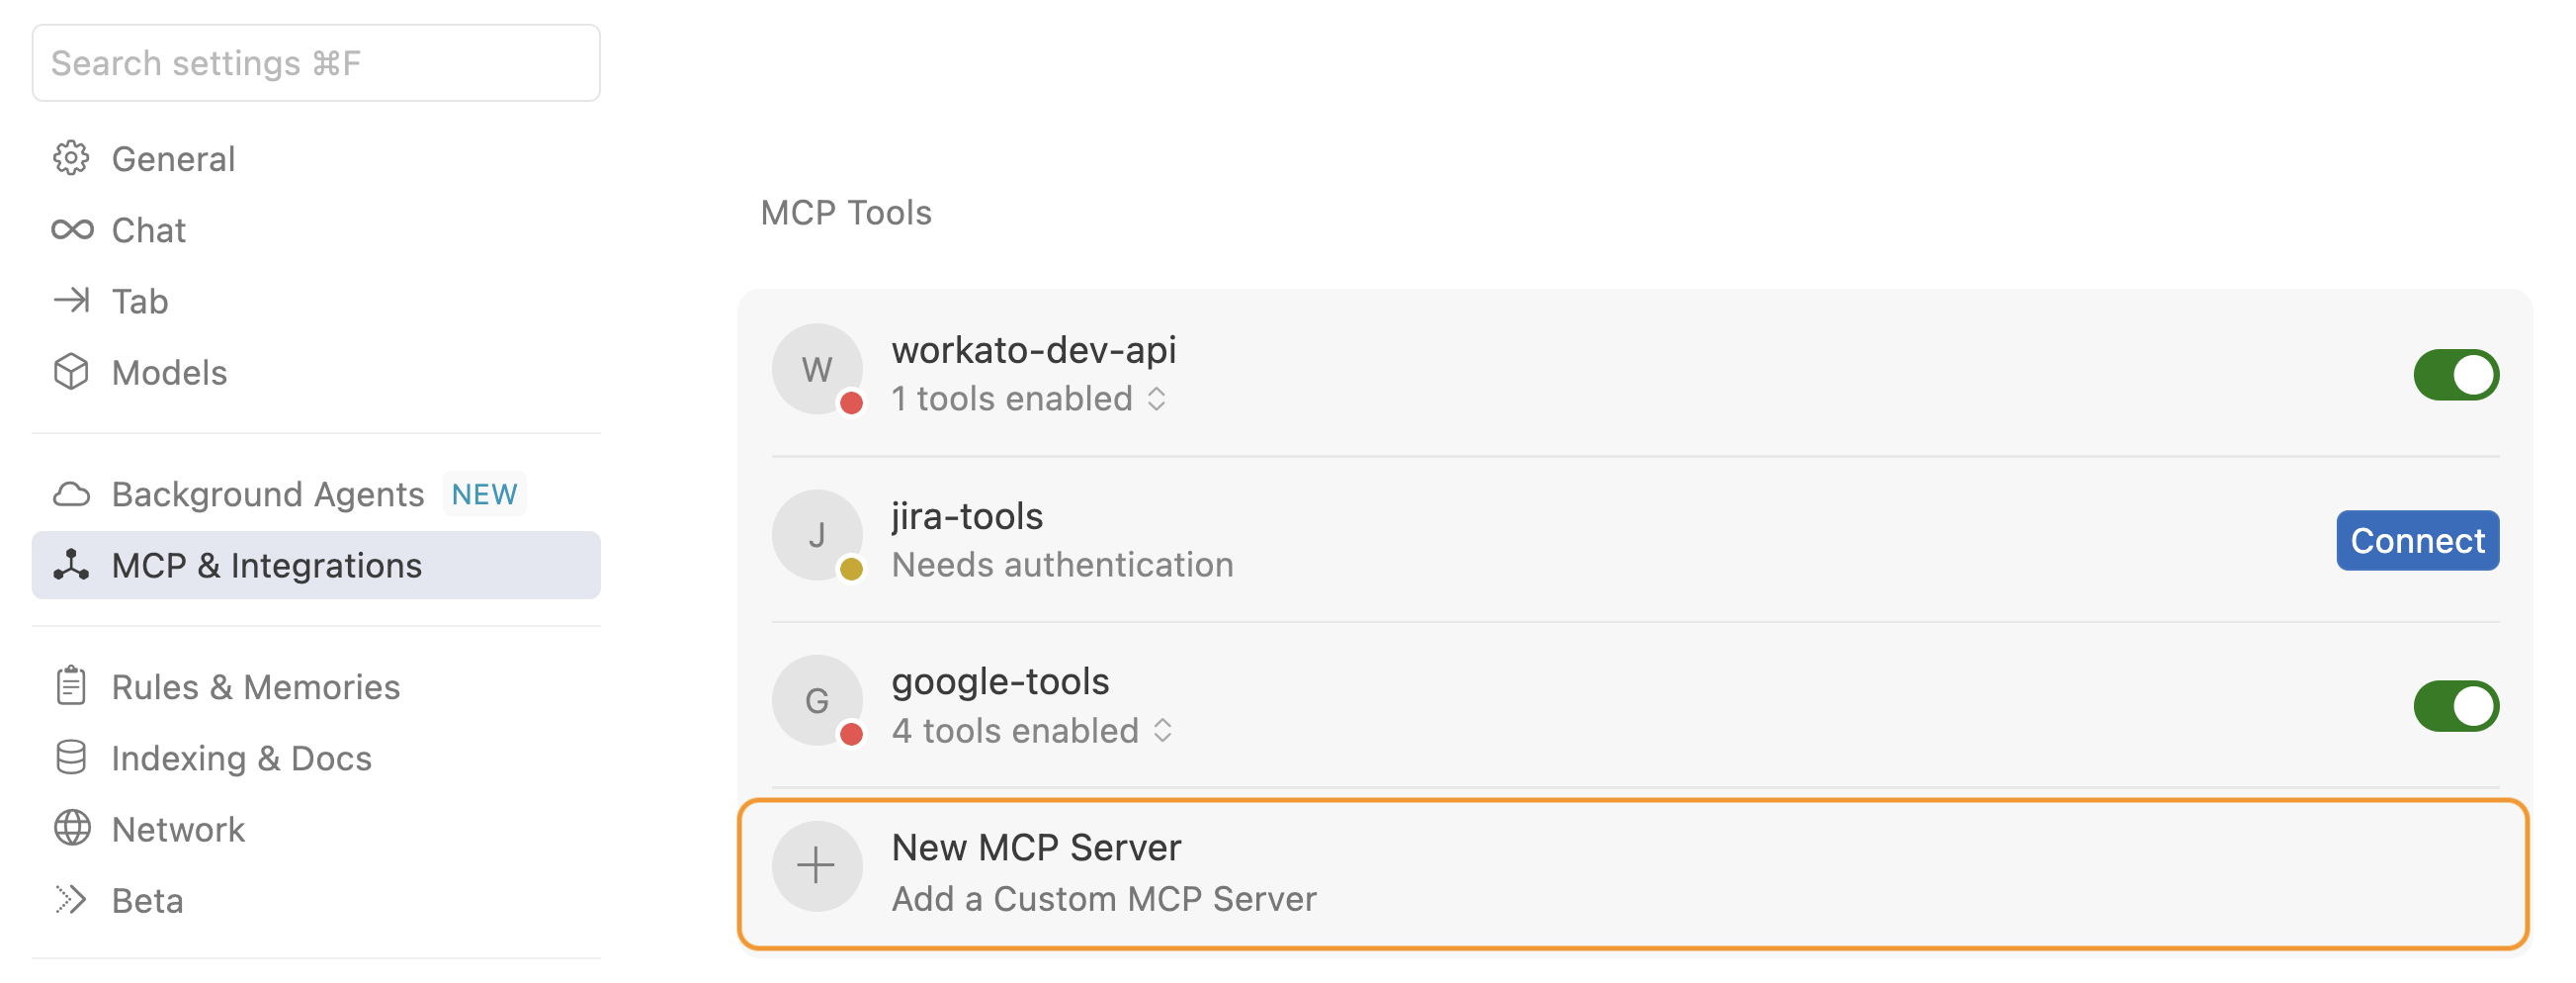 Click + New MCP Server
Update the configuration to use the MCP URL and token you copied in the preceding steps. For example:
{
  "mcpServers": {
    "snowflake-tools": {
      "url": "https://2255.apim.mcp.workato.com?wkt_token=YOUR_API_TOKEN"
    },
    "github-tools": {
      "url": "https://387.apim.mcp.workato.com/abc247/example-collection-name-v1?wkt_token=YOUR_API_TOKEN"
    }
  }
}
Save your changes.
Create a new chat with your Cursor agent to use your MCP tools.
You must start a new chat with your agent. Cursor agents only have access to the tools and capabilities available when a chat begins. Agents can't detect or use new MCP configurations, servers, or tools added after starting a chat.
Test your MCP tool in your LLM.
 Claude example chat
Last updated: 2/10/2026, 3:33:30 PM