Google Dialogflow
Dialogflow is a natural language understanding platform that makes it easy to design and integrate a conversational user interface into your mobile app, web application, device, bot, interactive voice response system, and so on. Using Dialogflow, you can provide new and engaging ways for users to interact with Workbot.
When Workbot is connected with Dialogflow, all commands sent to Workbot will be processed by your connected Dialogflow bot's NLP (instead of Workbot's default NLP).
FEATURE AVAILABILITY
The Google Dialogflow connector isn't available to workspaces in the CN data center. This reflects local regulatory requirements and applies to our multi-tenant and Virtual Private Workato (VPW) offerings.
API version
The Dialogflow connector uses Dialogflow API v2.
Workbot support for Dialogflow
Currently, Workbot for Slack supports the use of Dialogflow on Workato.
How to connect Dialogflow on Workato
To connect to Dialogflow, you must create and download the JSON private key of the Google Cloud Platform Service Account associated with your Dialogflow agent.
 Creating a private key will start a download of the JSON private key file
Once downloaded, you can open the JSON file using any text editor. 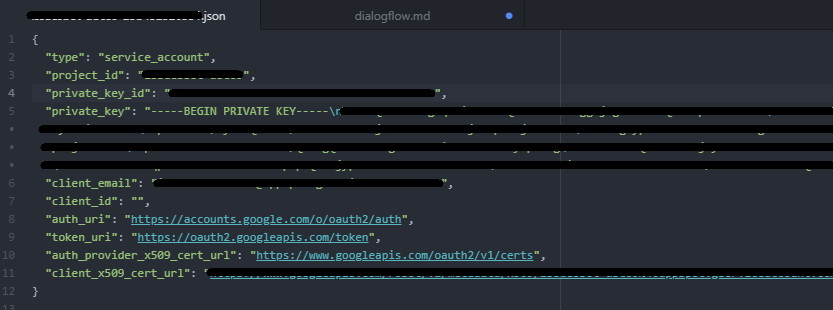
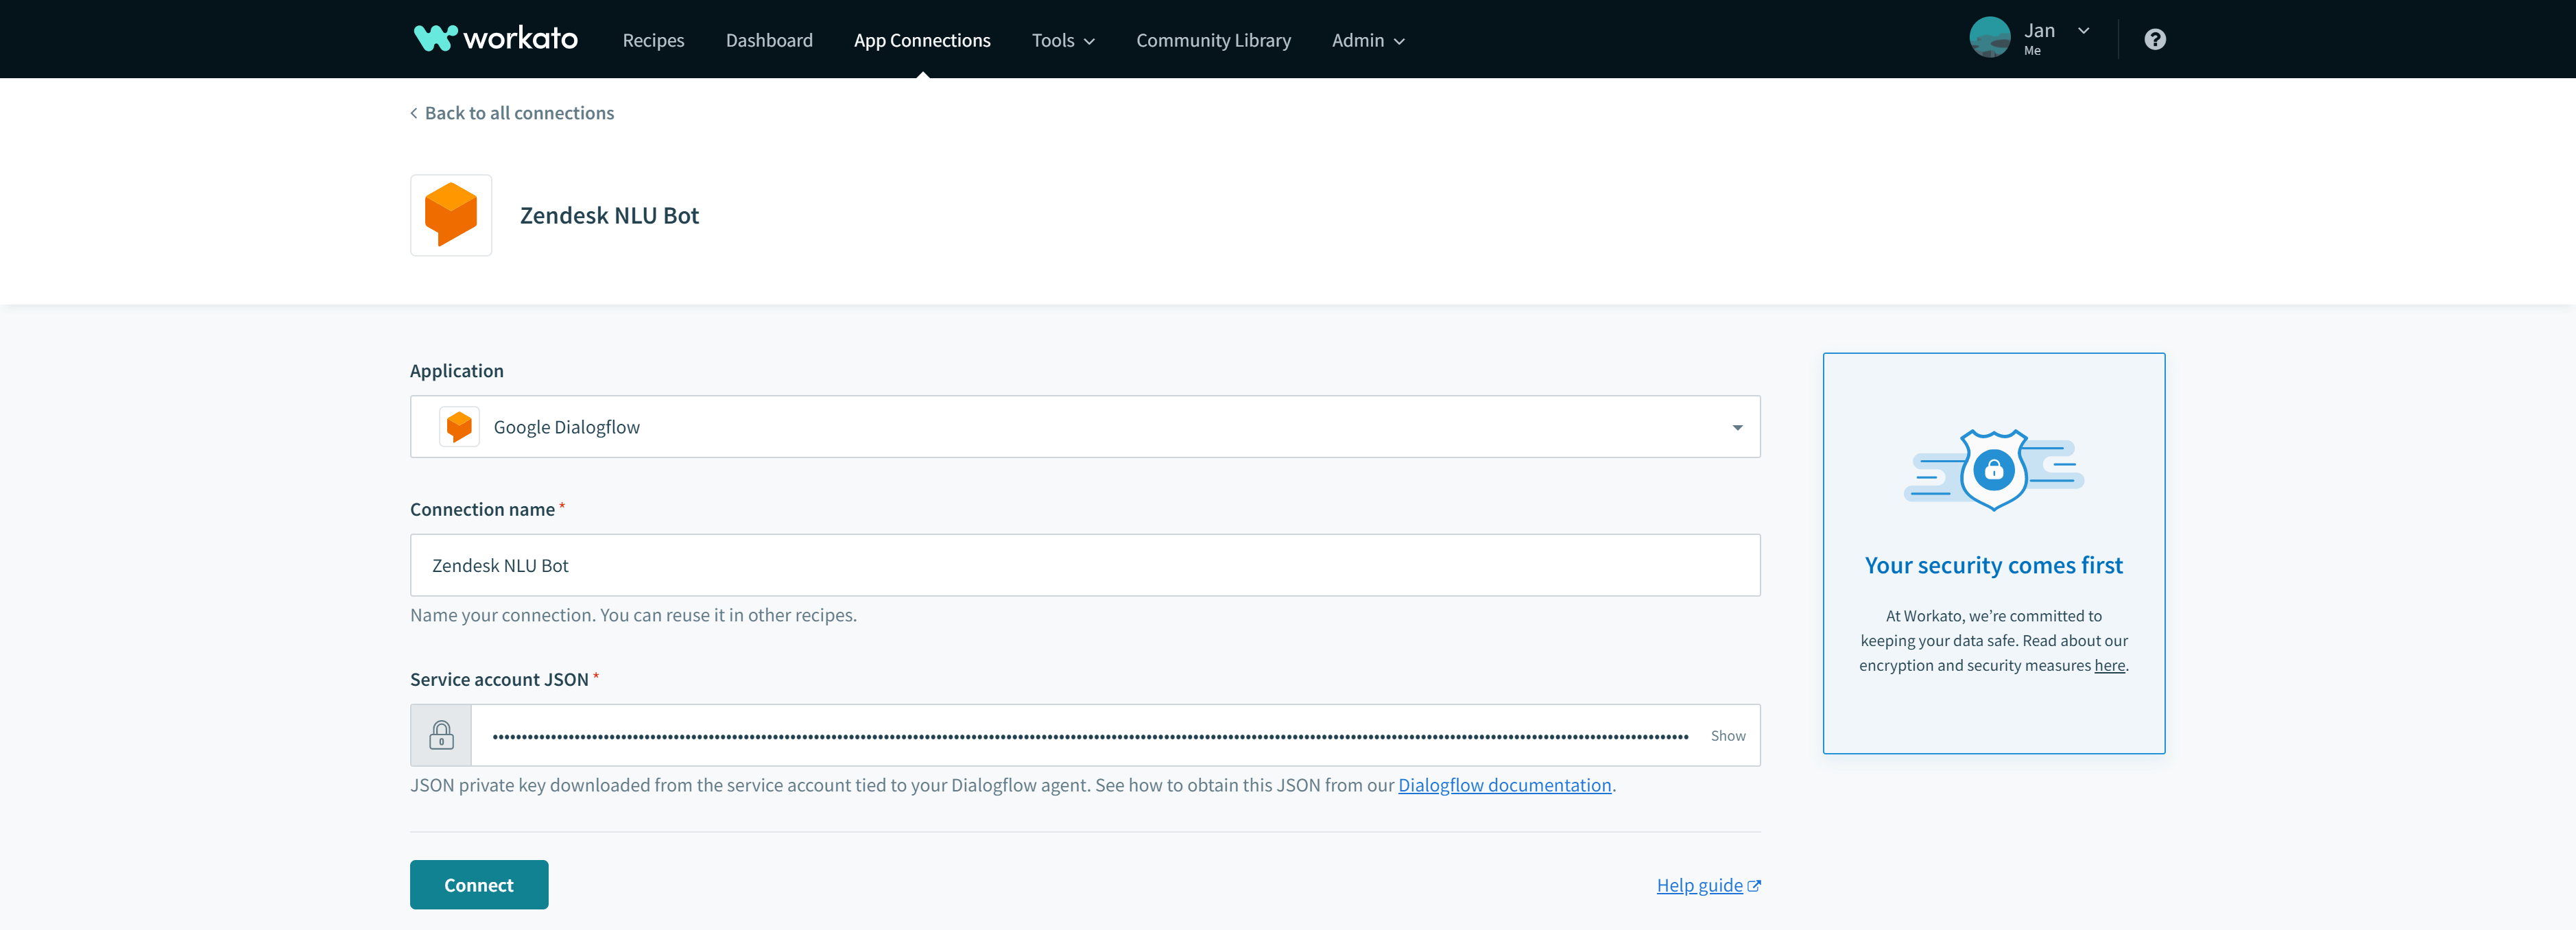
Copy its entire contents (i.e. the entire JSON) into the Service account JSON field in the Dialogflow connection, then click Connect.
CREATE A NEW AGENT AND PROJECT
This document assumes that you already have a Google Cloud project and a Dialogflow agent set up. If you don't, refer to Google's Create a project and Dialogflow agent guide to create them.
Creating a Service Account and getting the Service Account JSON
To connect your Dialogflow agent, you will first need to generate a private key for the Google Cloud Platform Service Account associated with your Dialogflow agent. This key can be downloaded as a JSON file once you create the new Service Account.
AVOID MODIFYING DEFAULT SERVICE ACCOUNTS
Avoid modifying the default service account included with your Google Cloud project. Instead, create a new service account to manage additional client and developer API access.
From your Dialogflow console, head to your agent's settings by clicking on the gear icon of your agent, to the right of the agent name.
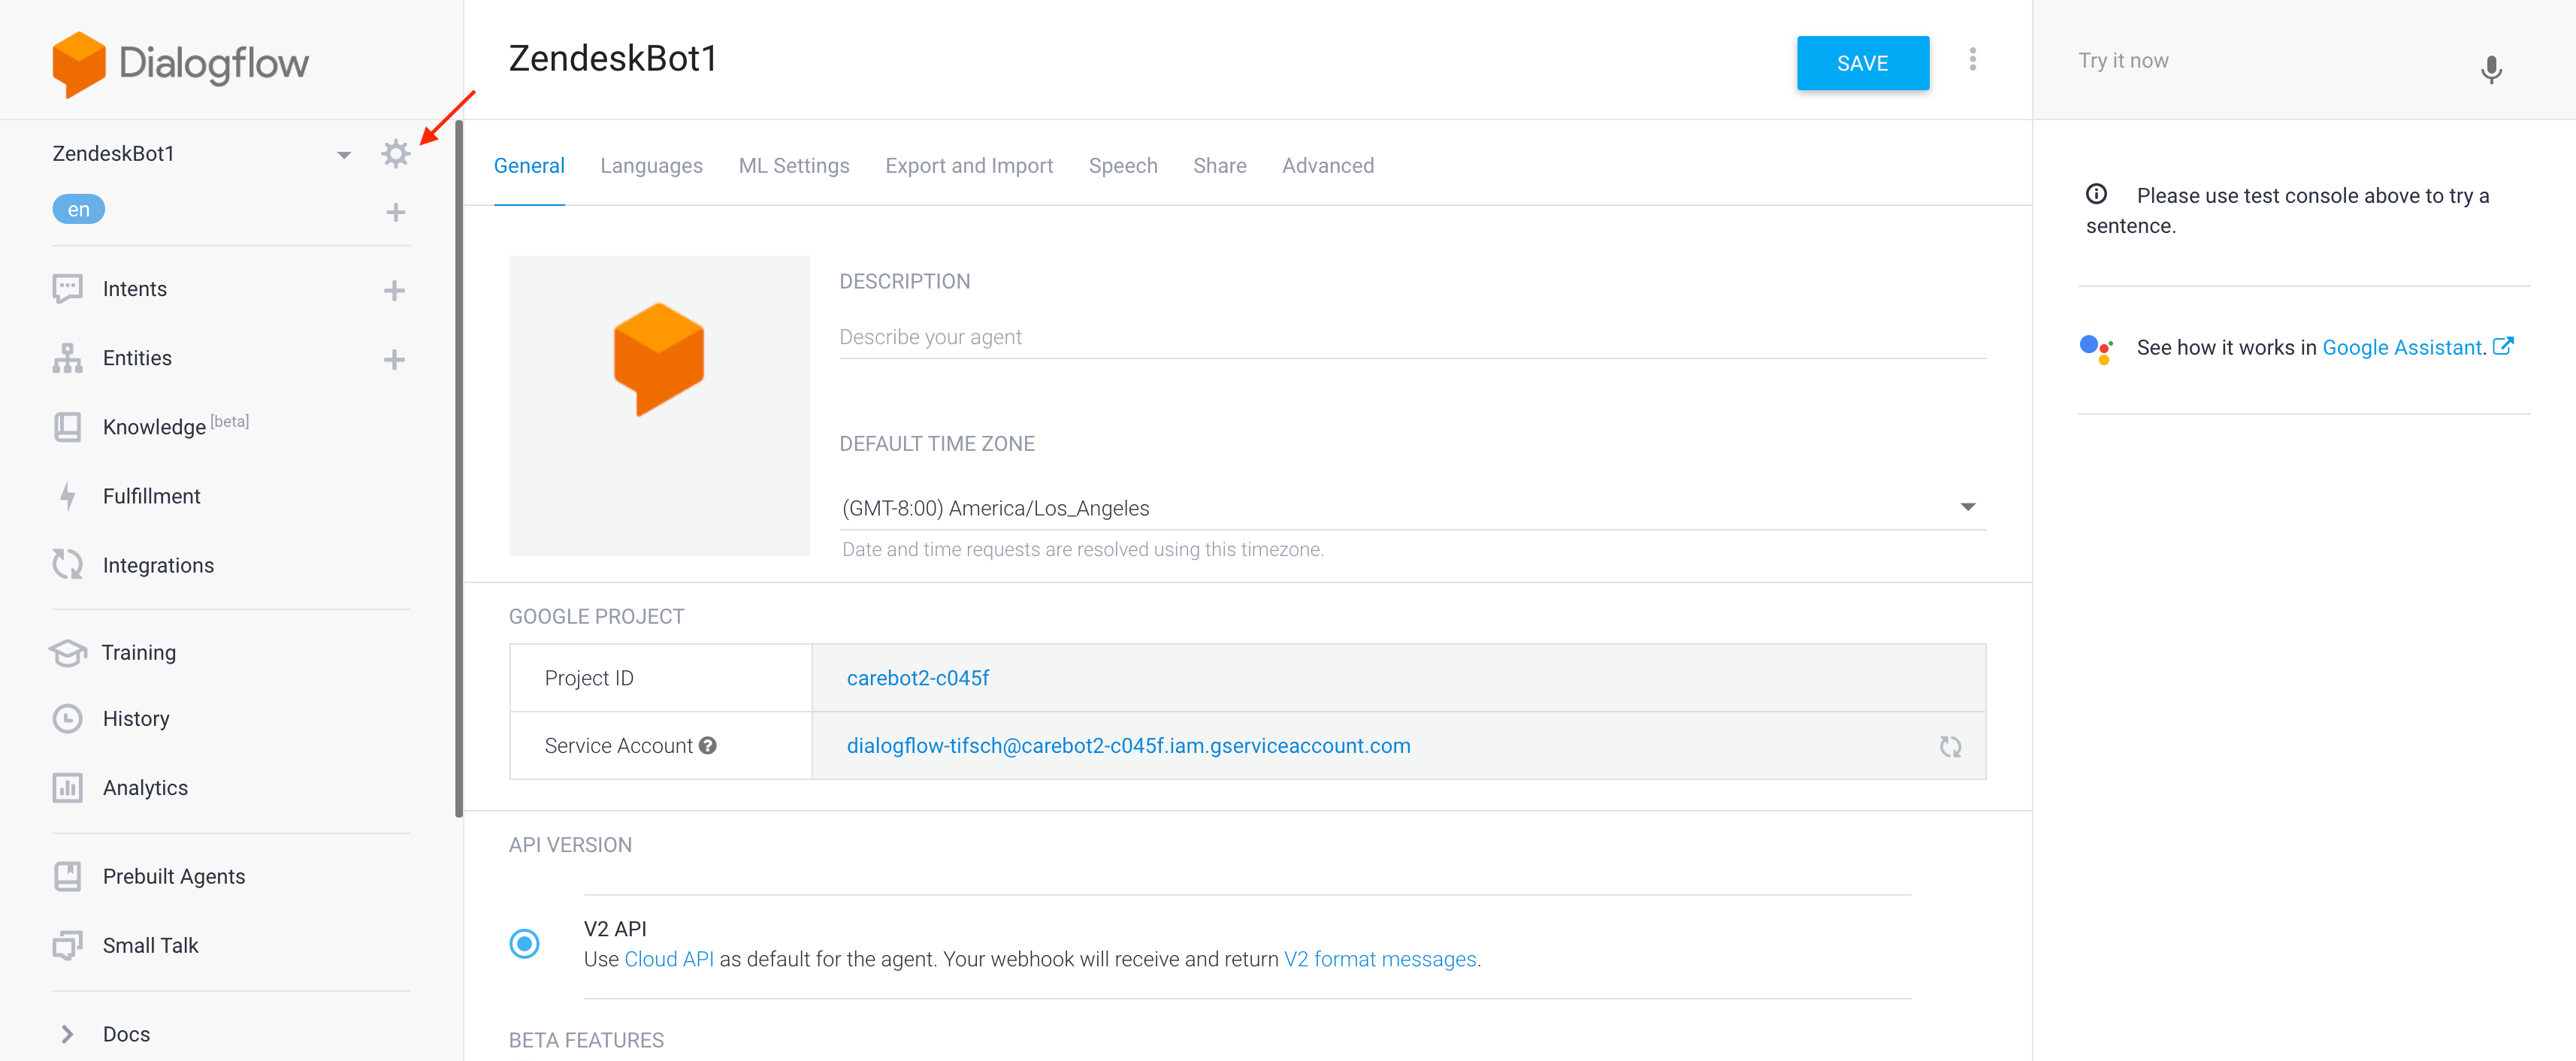 Dialogflow agent settings
If you wish to use another project, you’d need to create a new agent. You can easily do so from any existing project by going to the ‘Export and Import’ tab and clicking the ‘EXPORT AS ZIP’ button.
Under the GOOGLE PROJECT section, select the name of the Service Account.
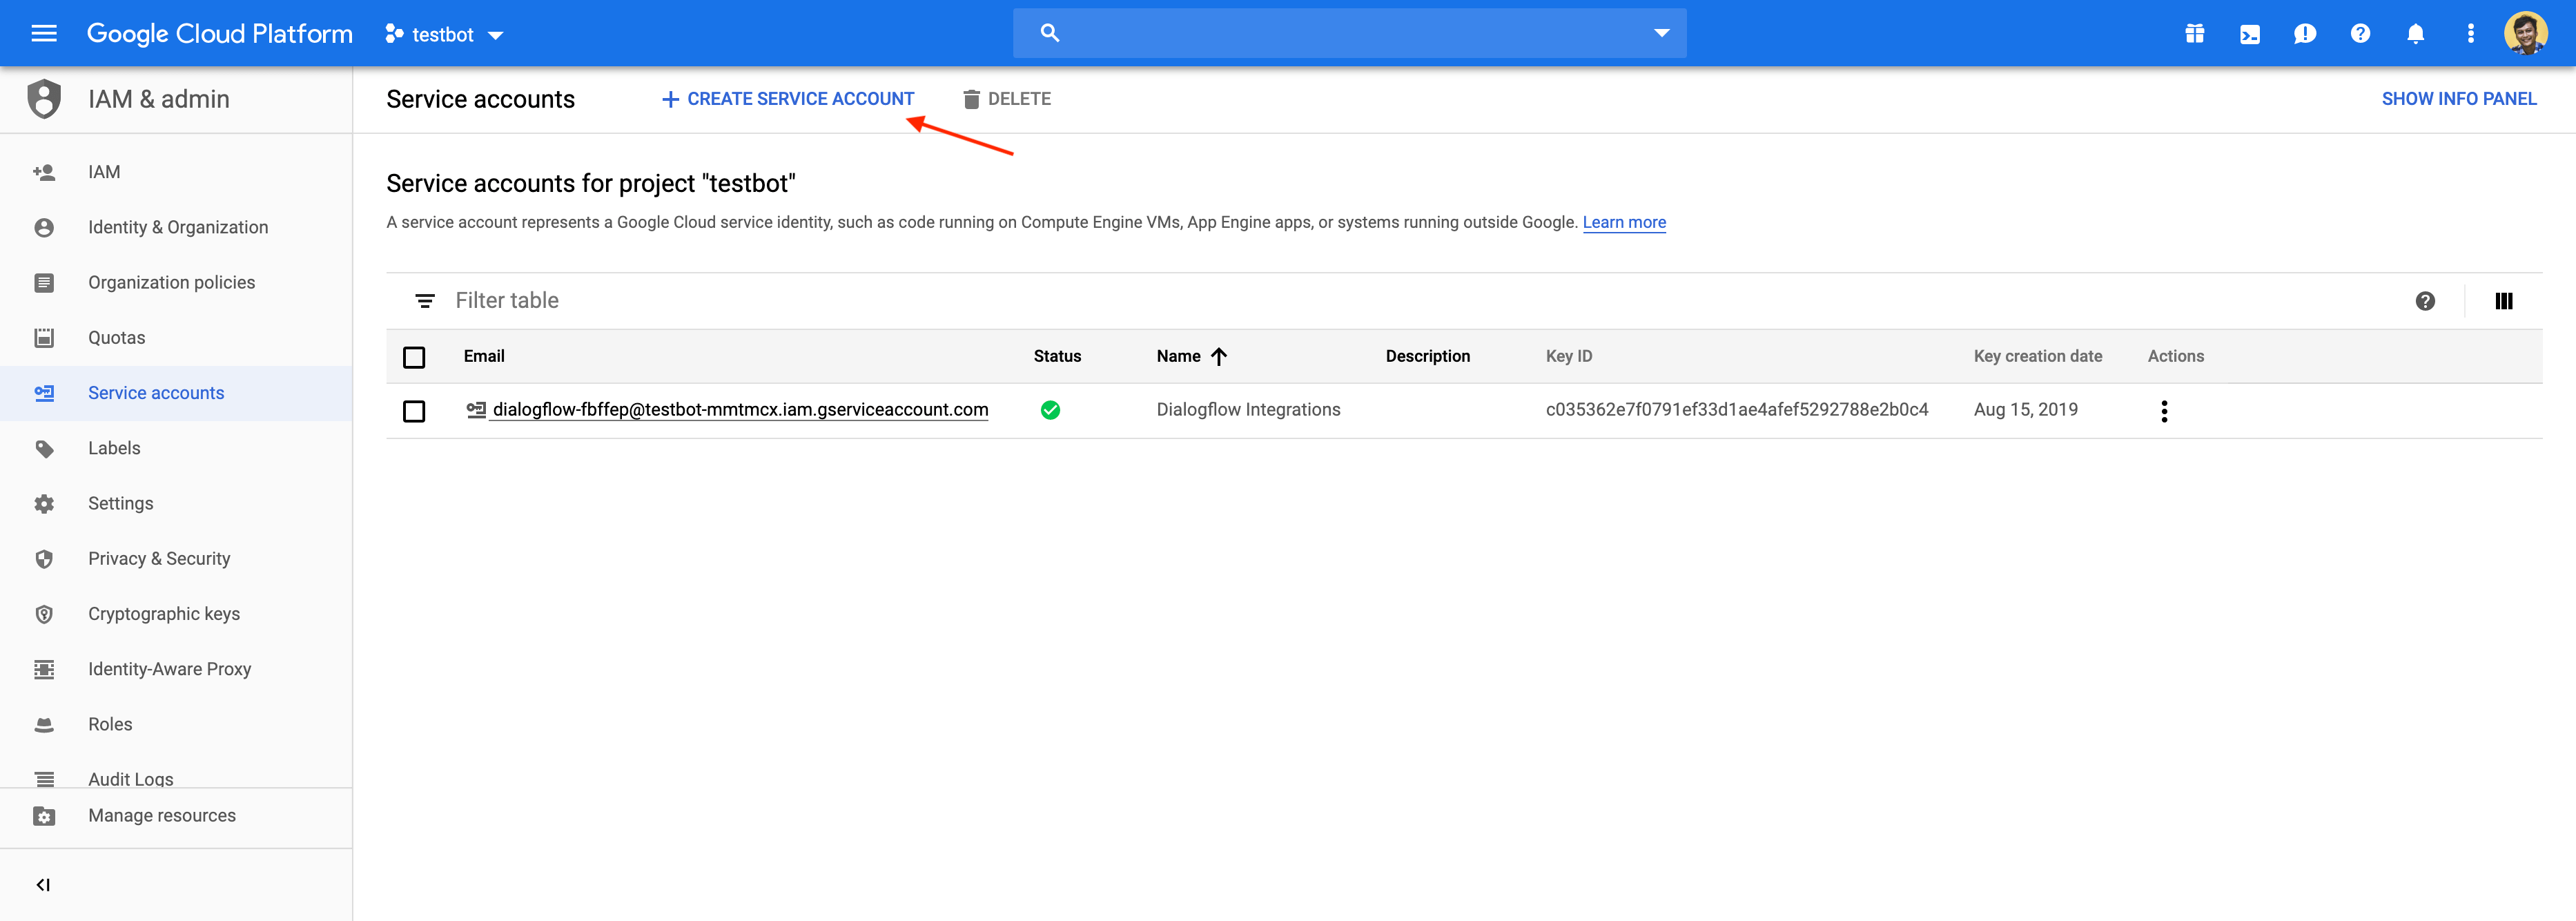
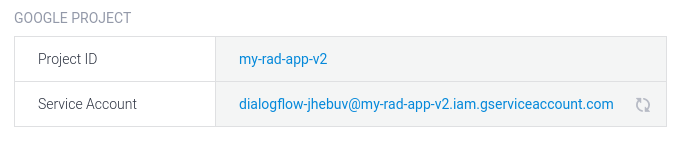 Getting to the Google Cloud Platform Service Accounts page This will take you to the Google Cloud Platform Service Accounts page.
Select the Create Service Account button at the top of the page.
In the pop-up, enter your preferred details for this service account, then click Create.
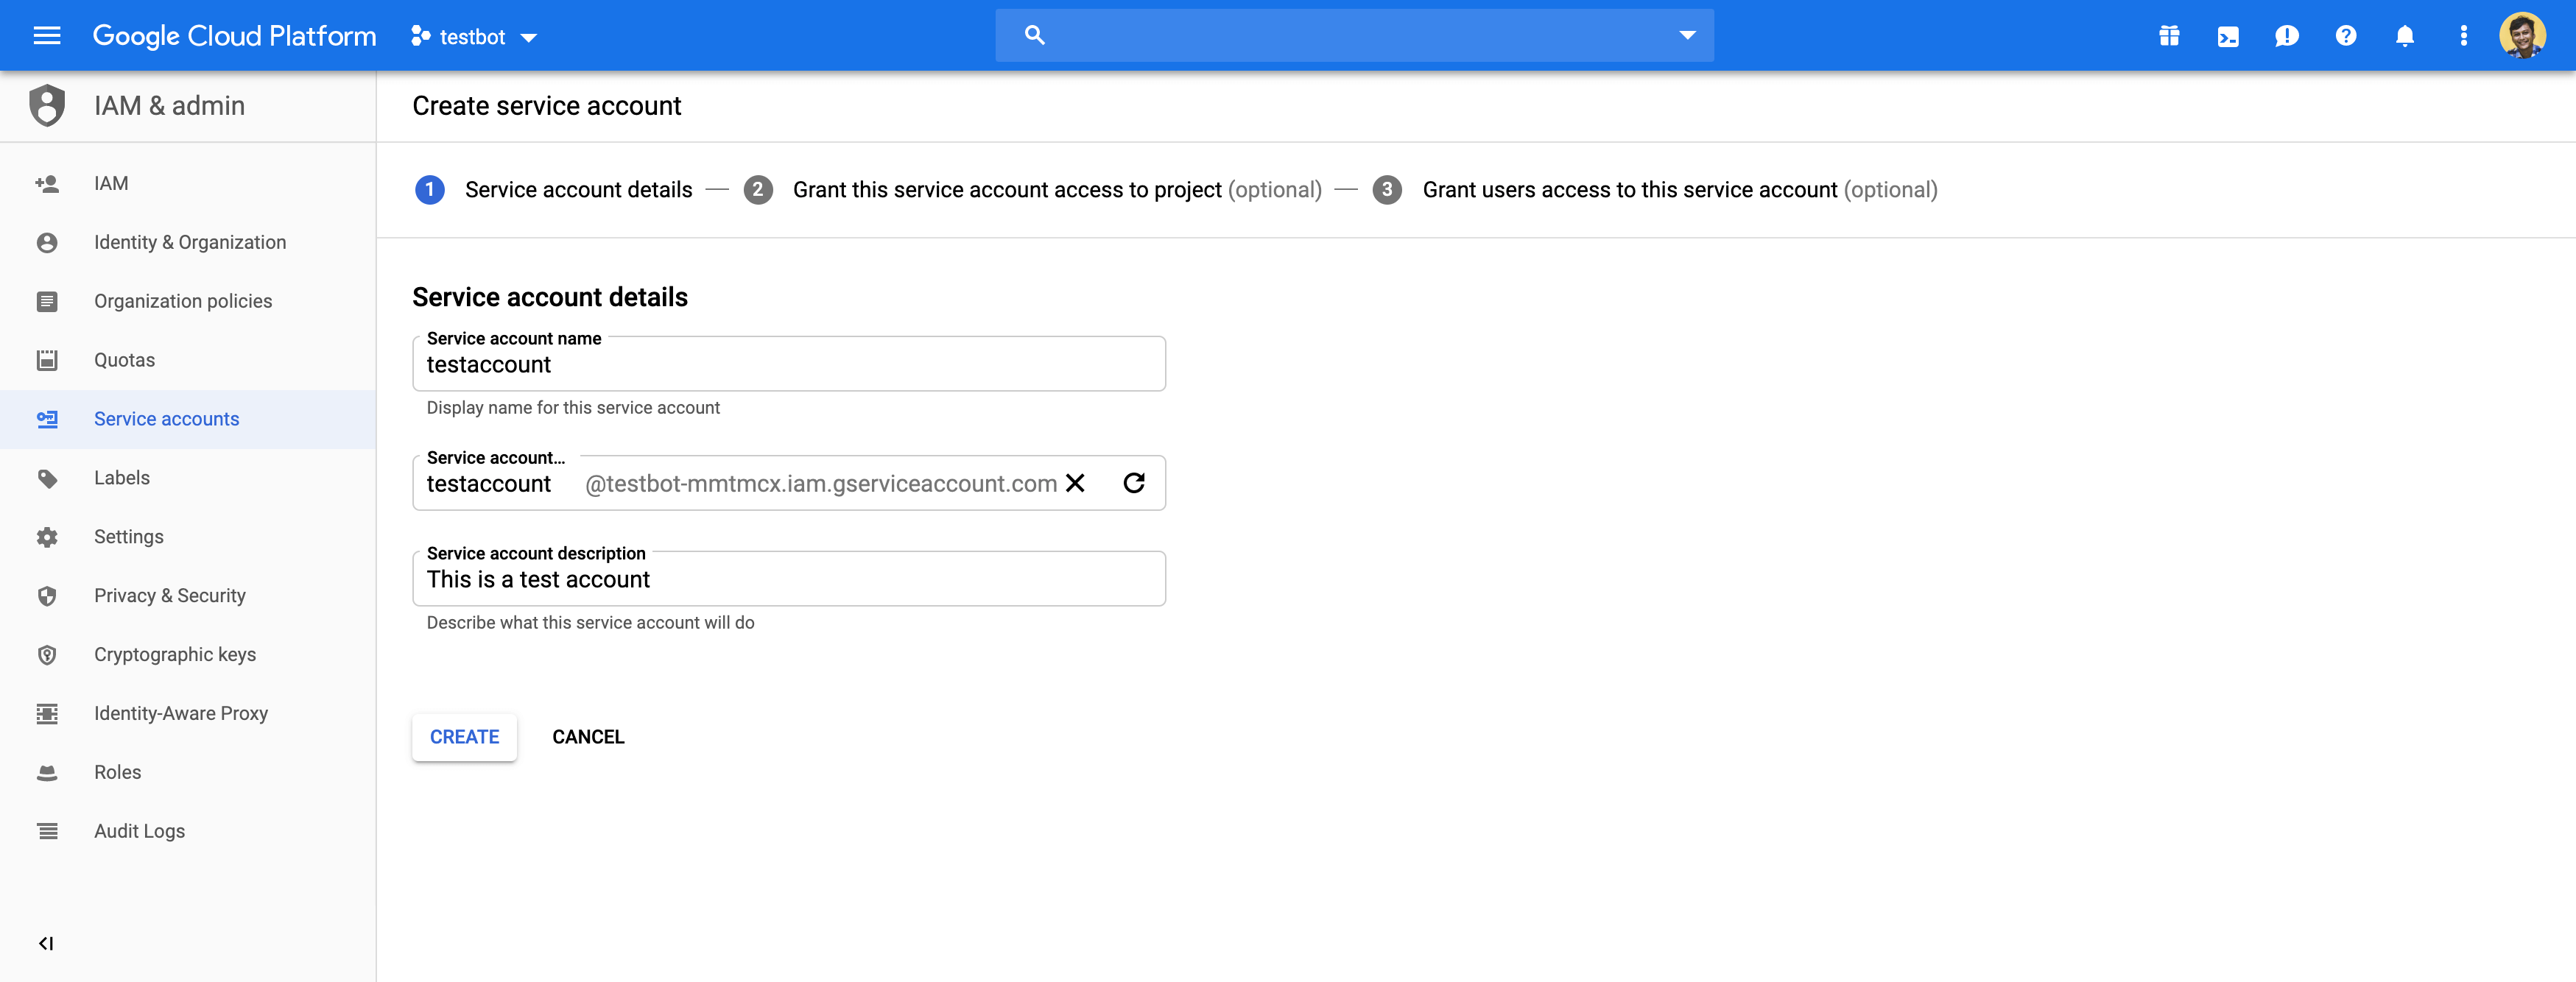 Creating a service account for your agent
Next, you'll need to grant this service account access to your agent so it has permissions to operate optimally. Under the Dialogflow category, filter by 'Dialogflow' and select from any of the following roles.
| Role name | Access Description |
|---|---|
| Dialogflow API Admin | Full API access |
| Dialogflow API Client | Session-level API access |
| Dialogflow API Reader | Read-only API access |
 | |
| Service account roles |
Once done, select Continue.
Create a key for this service account by clicking on the Create key button.
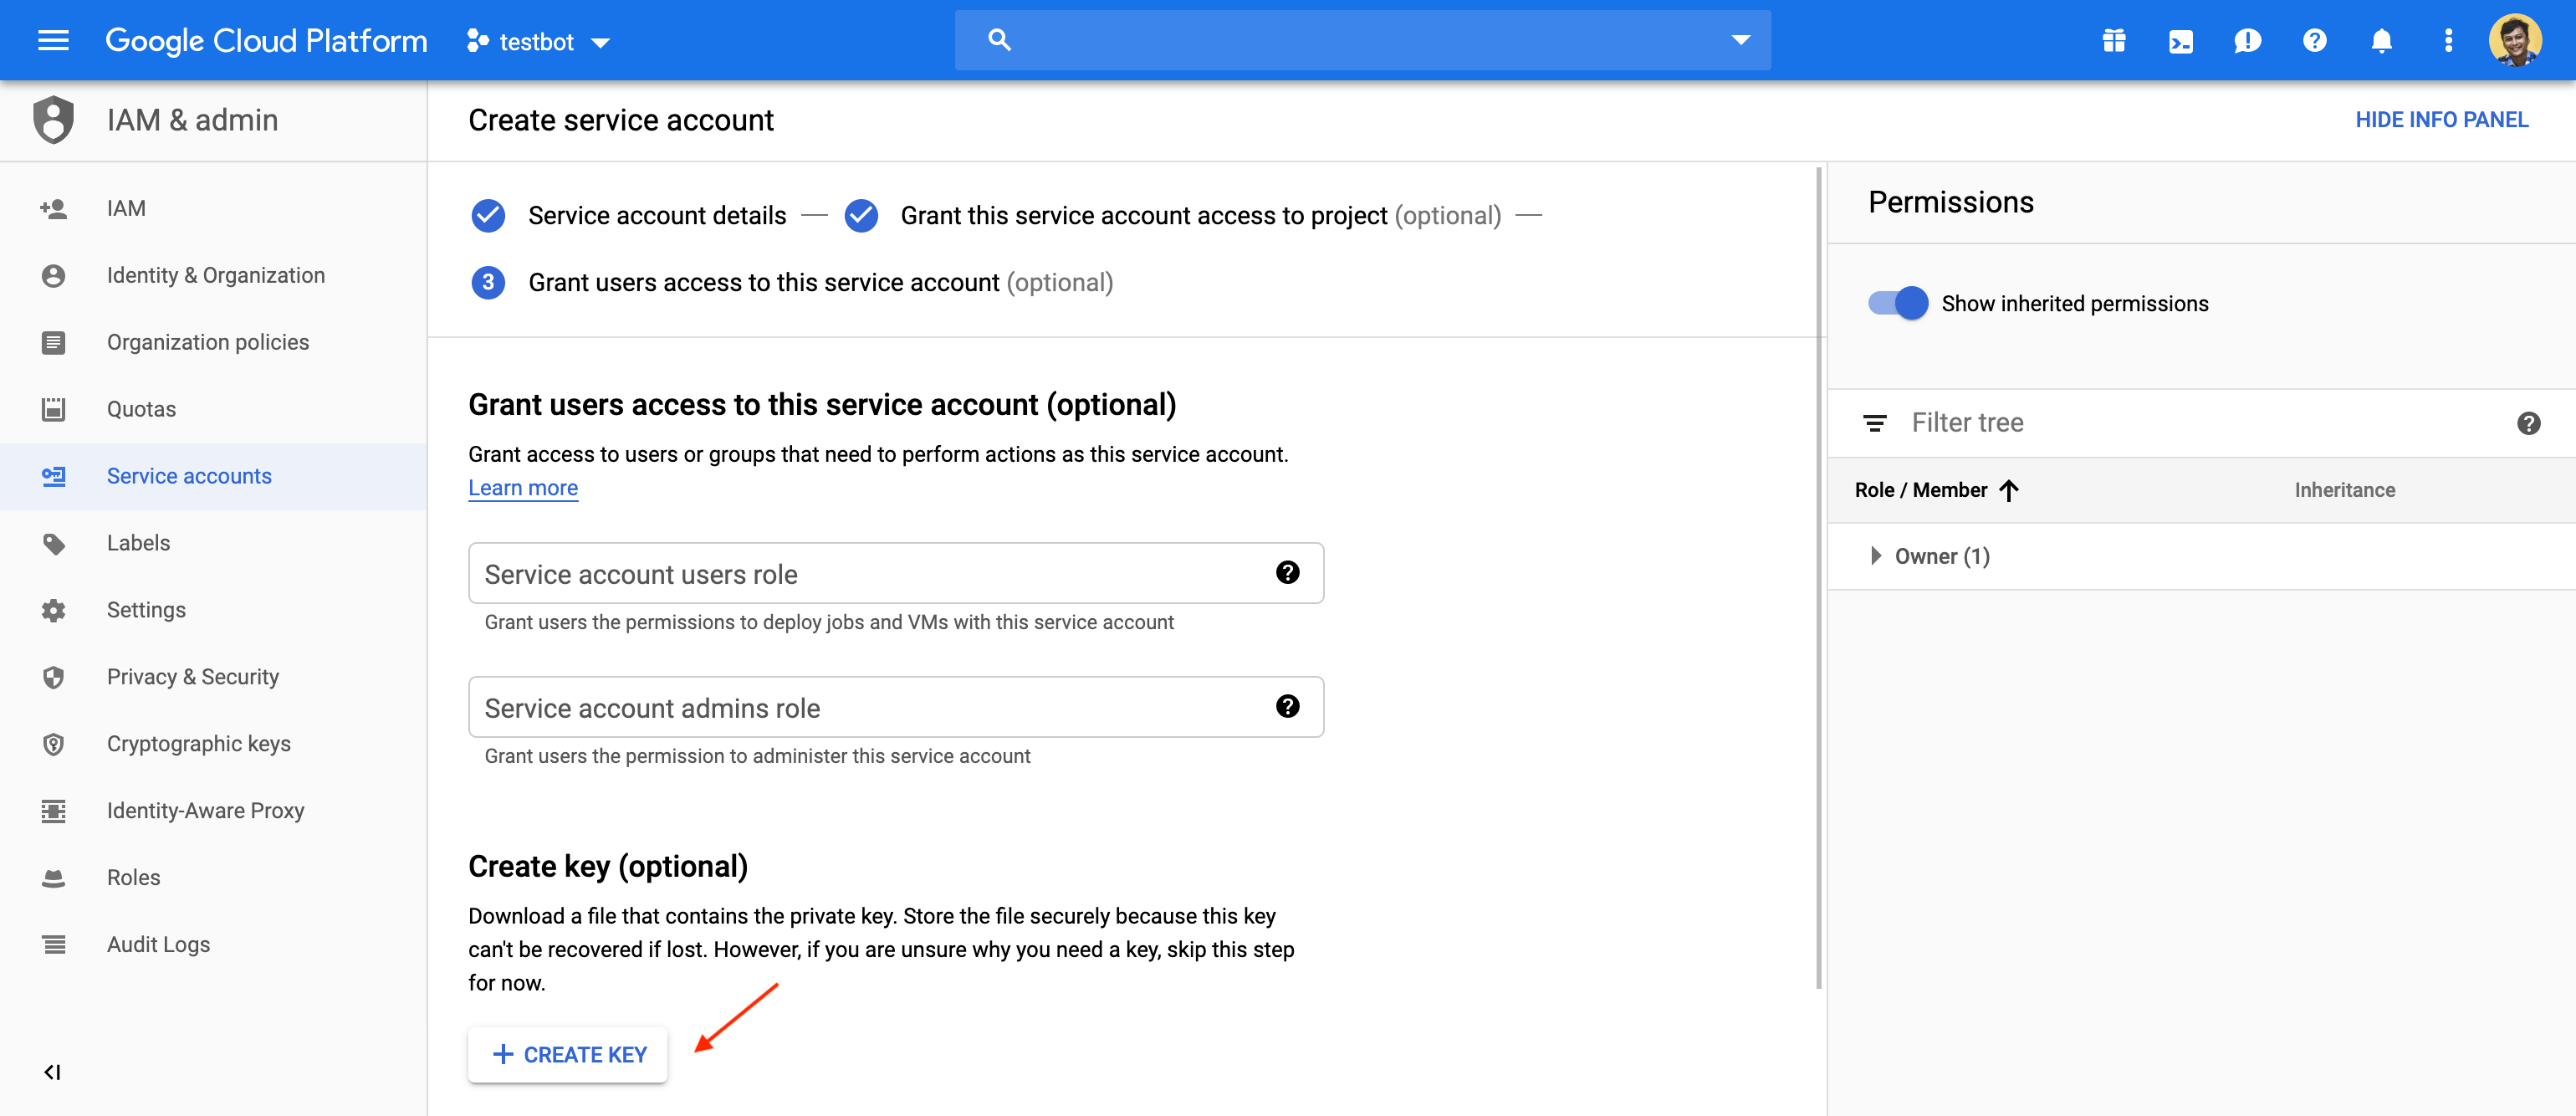 Begin creating a key
Choose JSON as the Key type, then click the Create button.
 Choose JSON key type
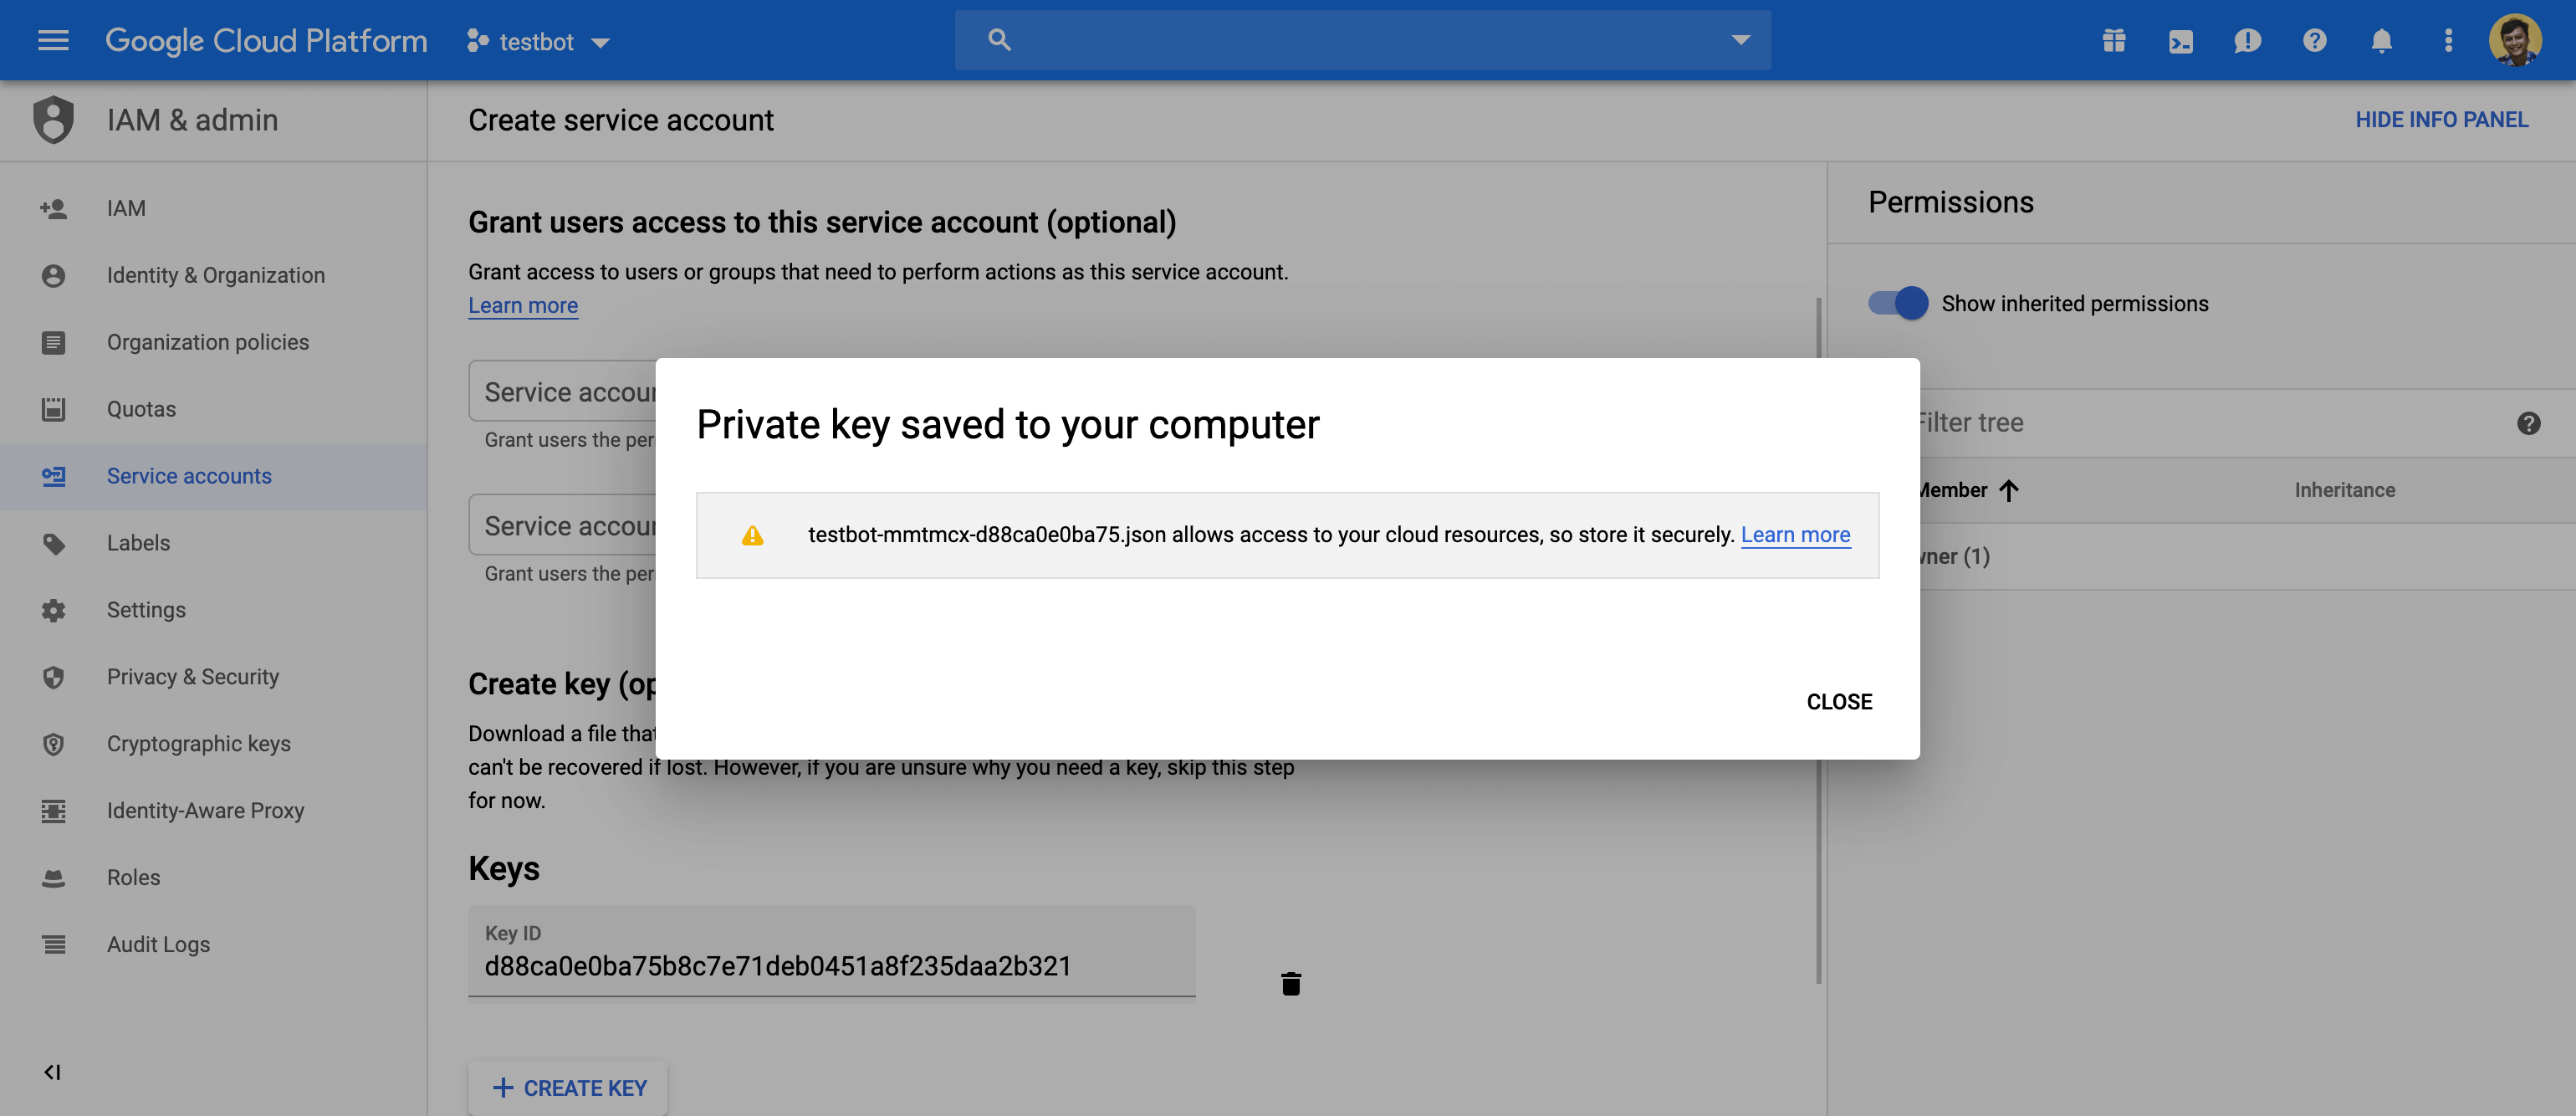
When the key is created, a download of the JSON file will start. Save the JSON file.
KEYS CAN ONLY BE DOWNLOADED ONCE
You can only download a service account key once. If you lose the old one or it becomes compromised, repeat these steps to generate a new one.
Once complete, you'll see a pop up with a confirmation message. Click Close.
Open the downloaded JSON file using any text editor (for example, Atom). Copy its entire contents (i.e. the entire JSON) into the Service account JSON field in the Dialogflow connection, then click Connect.
Last updated: